Home / GCP / GCP Training / Worked Example - Create Load Balanced Web-Server Managed Instance Group
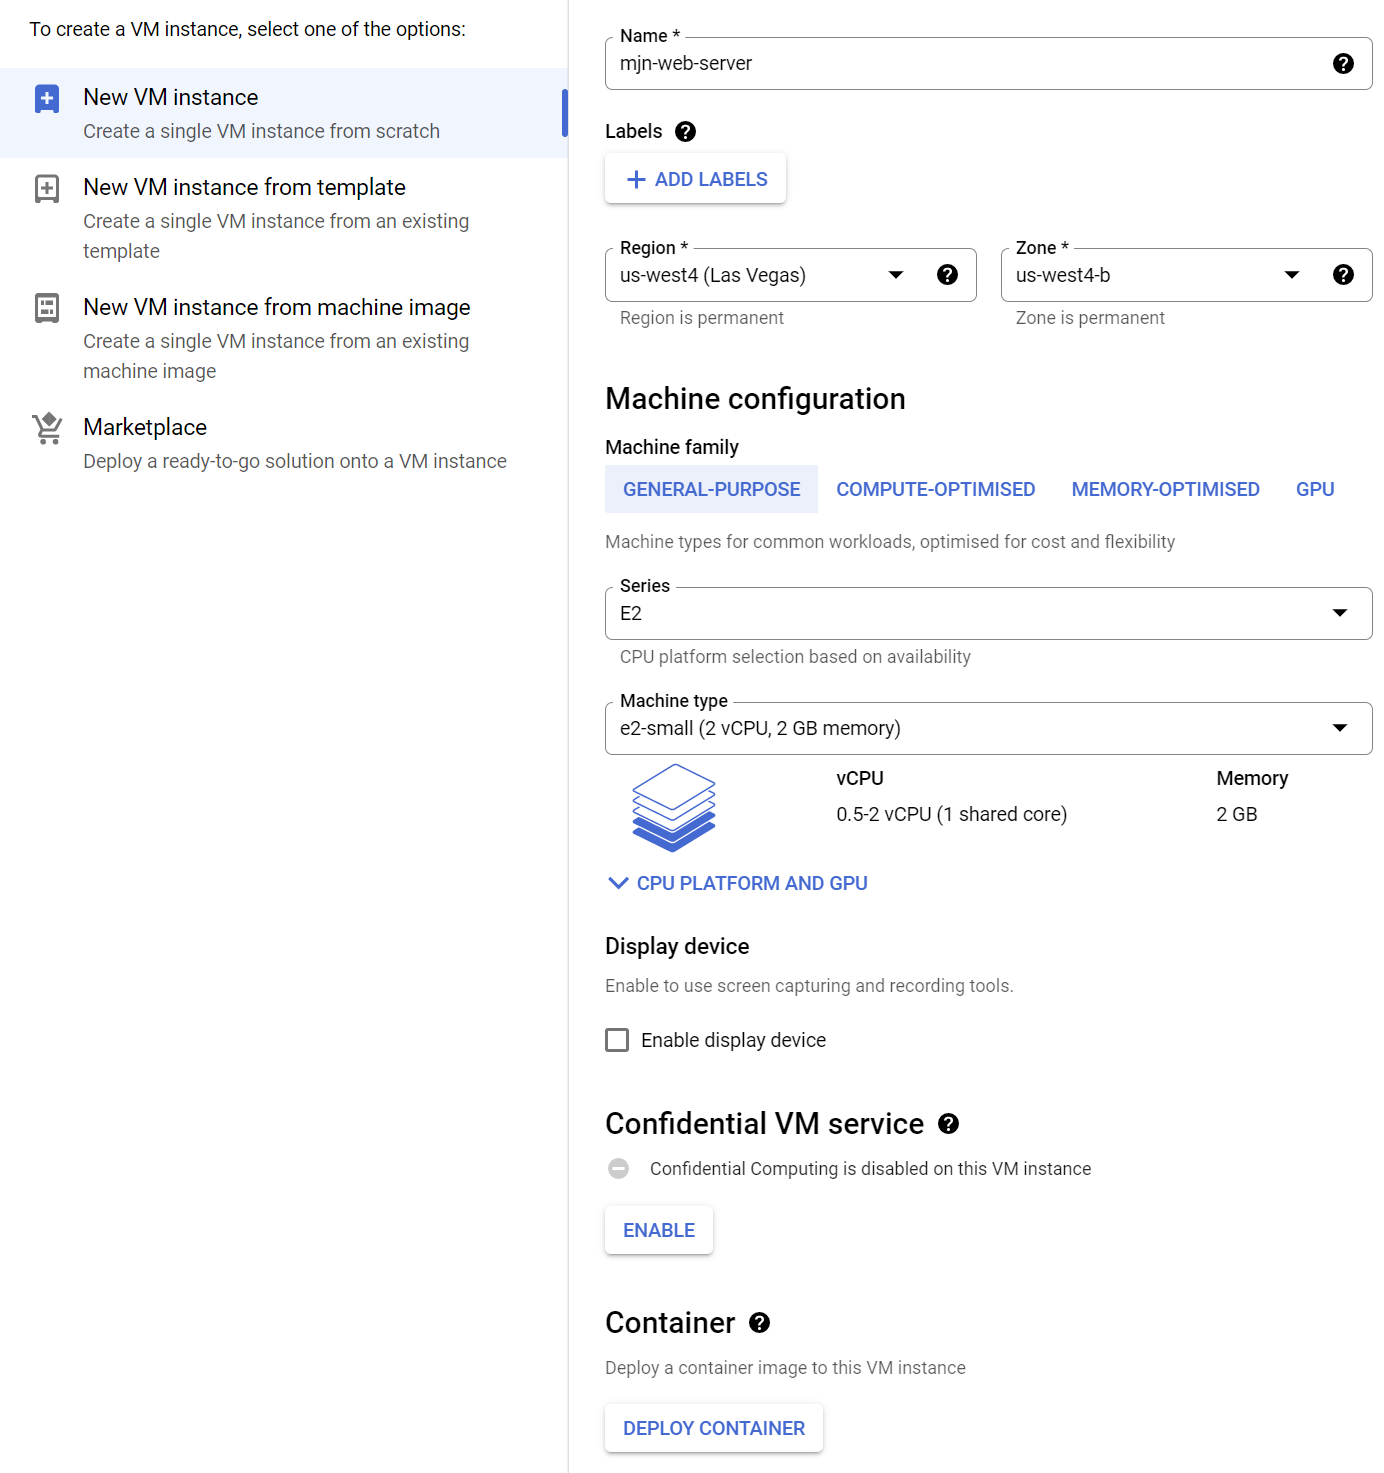
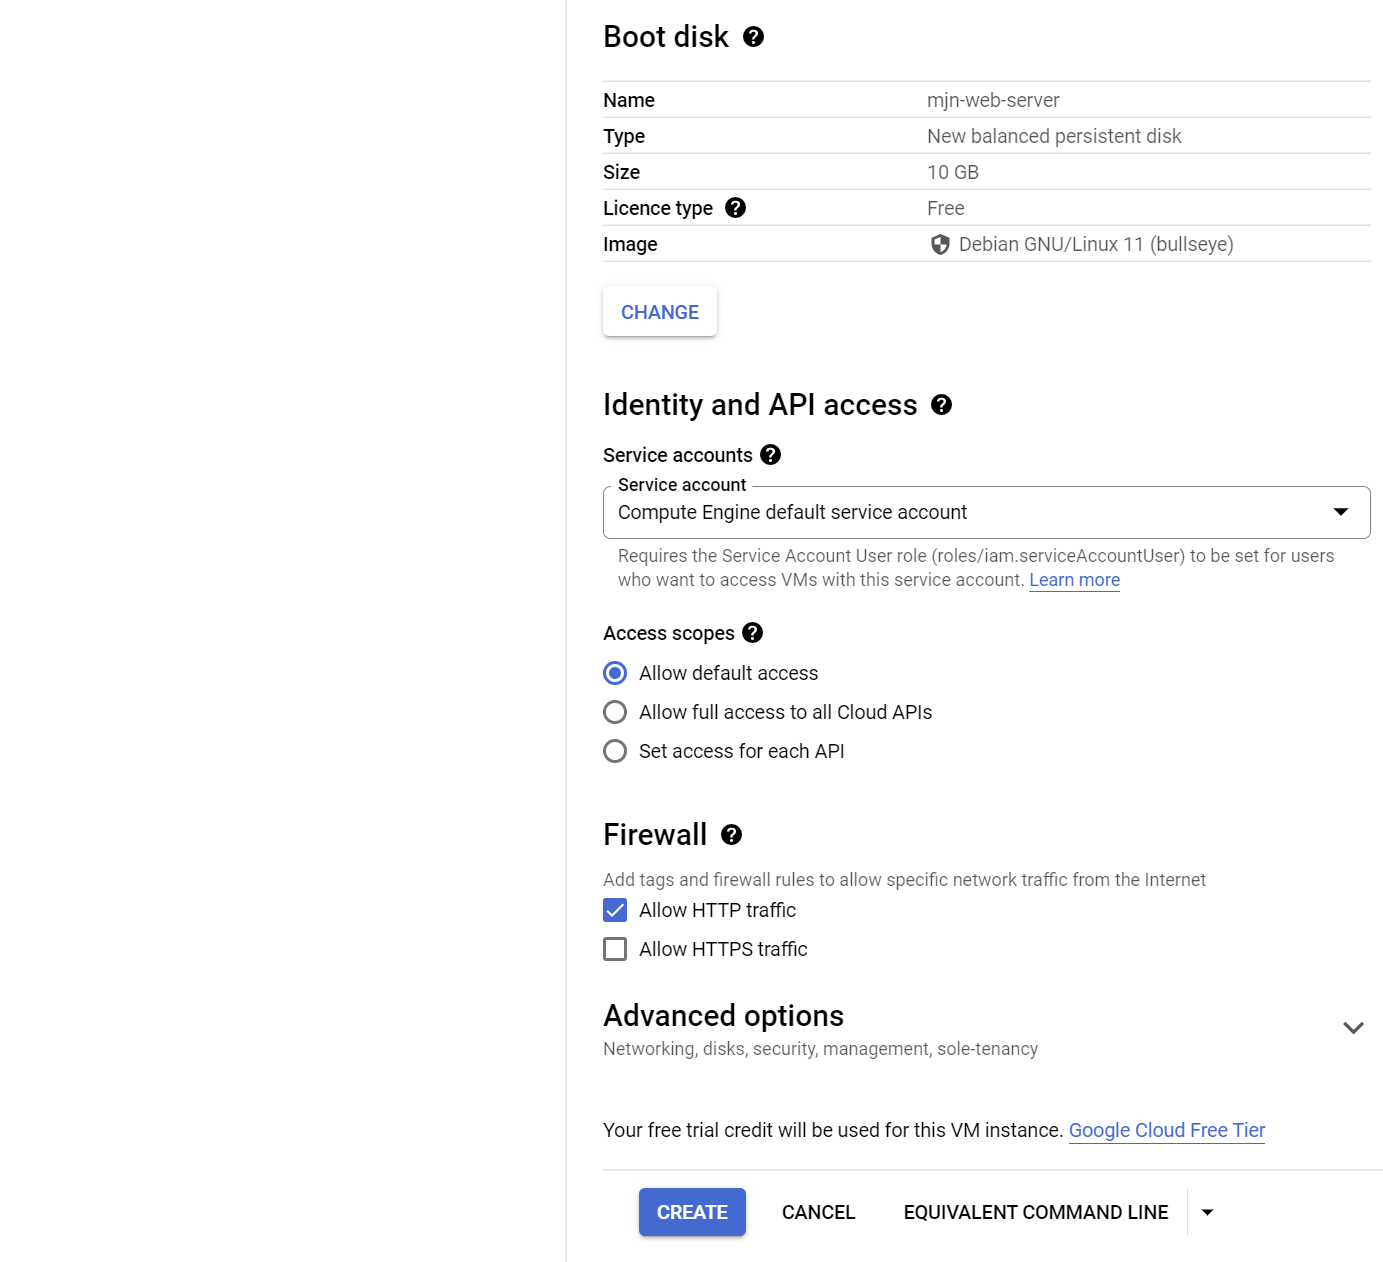
1. Create a VM.
Create a VM
Note:
- Select Allow HTTP traffic.
 |
 |
2. Install Apache, create a default web page.
SSH to the VM and install config Apache web server. Create a script to run when the instance boots which sets the default web page to show the machine name. Use crontab to run this script when the machine boots.
> sudo su

> apt install apache2

# Create a script to set the default webpage to display the hostname on boot.

> echo 'echo "Hello!" > /var/www/html/index.html' > /onboot.sh
> echo 'hostname >> /var/www/html/index.html' >> /onboot.sh
> echo 'hostname -I >> /var/www/html/index.html' >> /onboot.sh

> chmod +x /onboot.sh

# Update crontab to run the onboot.sh script when the machine boots.

> echo "@reboot /onboot.sh" > mycron

> crontab mycron
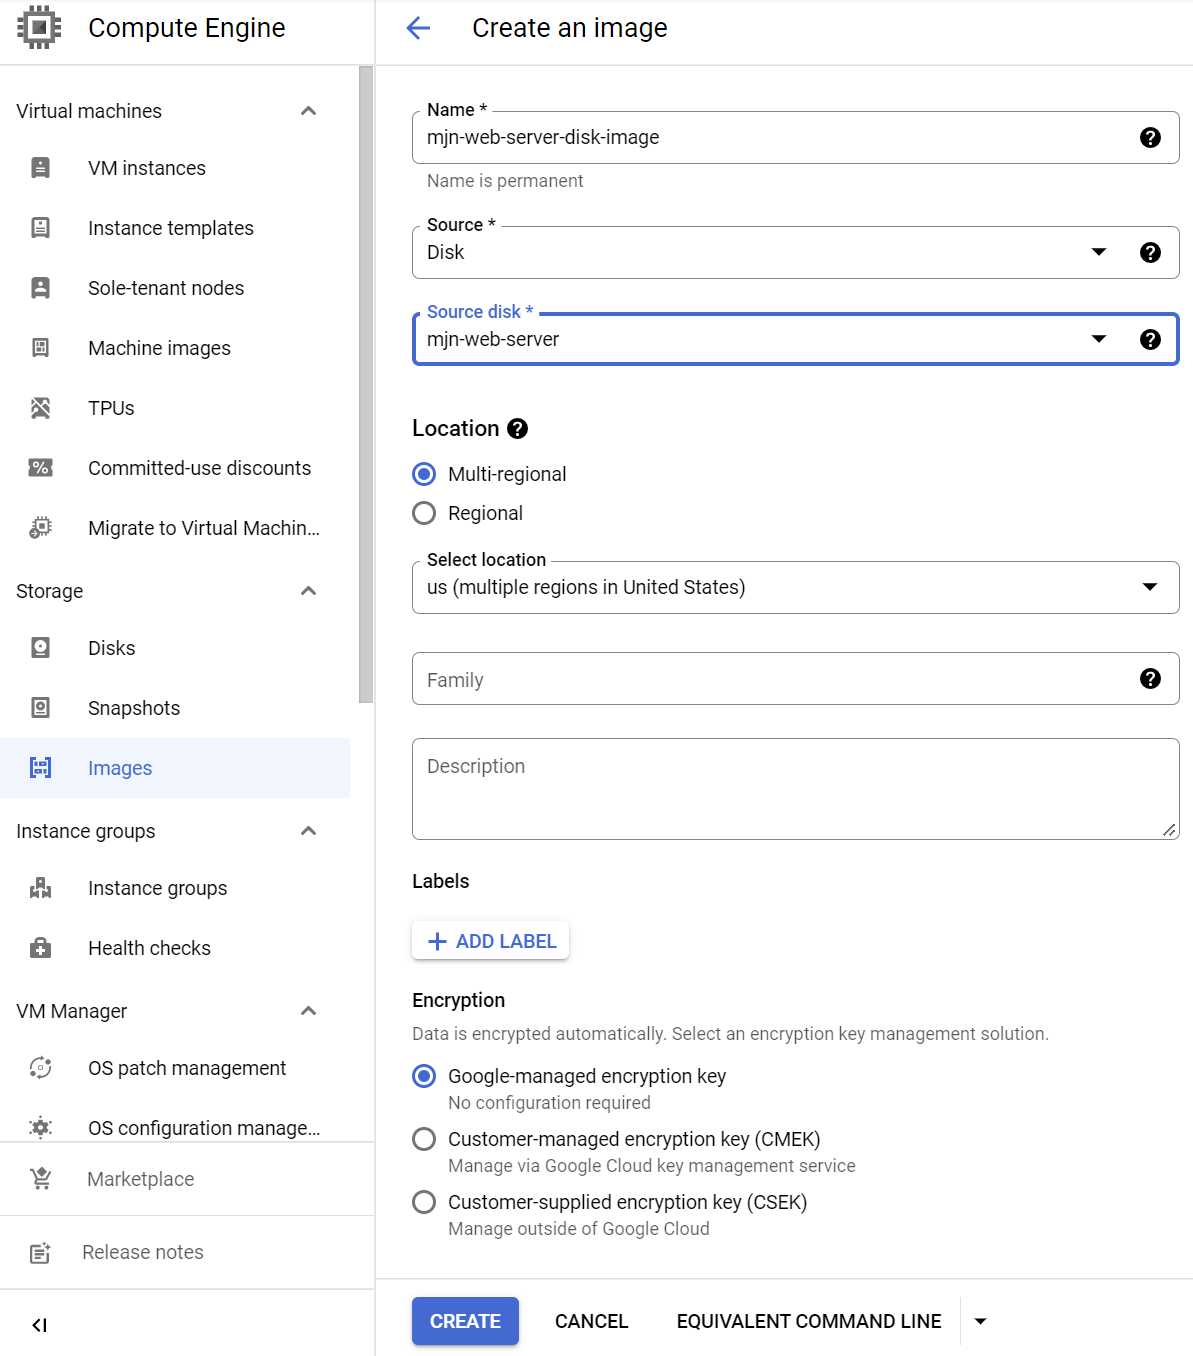
3. Create an image of the boot disk.
Stop the VM, then create an image of the boot disk.
 |
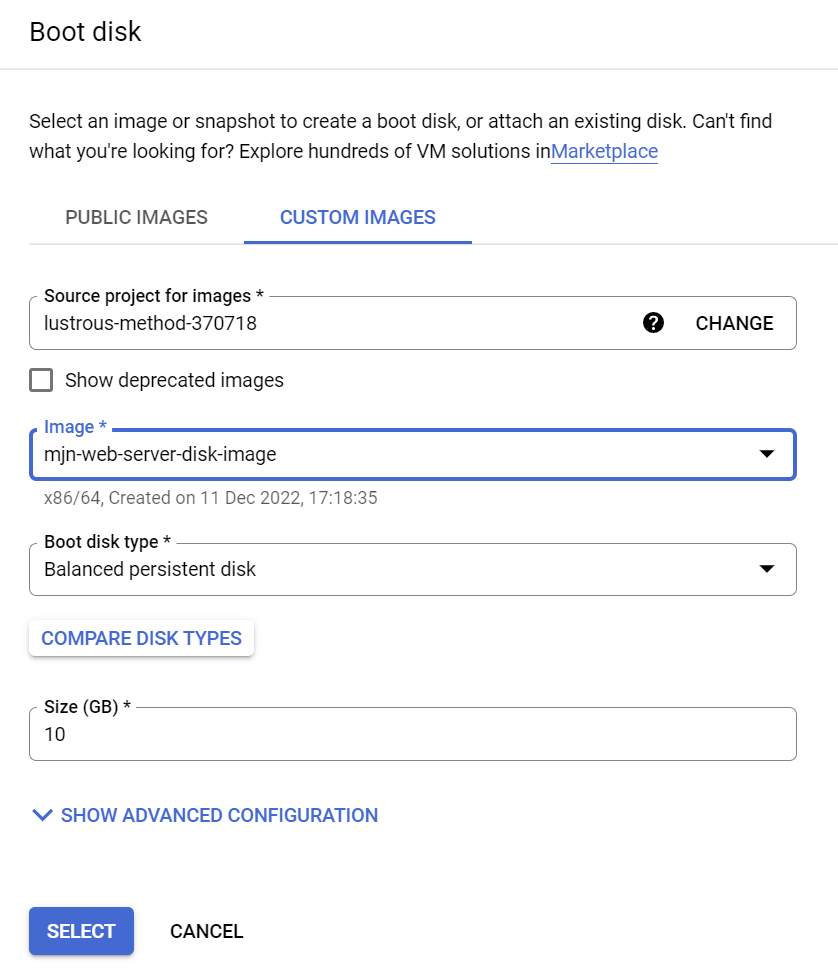
4. Create an instance template and use the boot disk image.
Create an instance template mjn-web-server-instance-template - use the same VM setting as in step 1 but replace the default boot disk - select a Custom Image and choose the disk image created in step 3.
 |
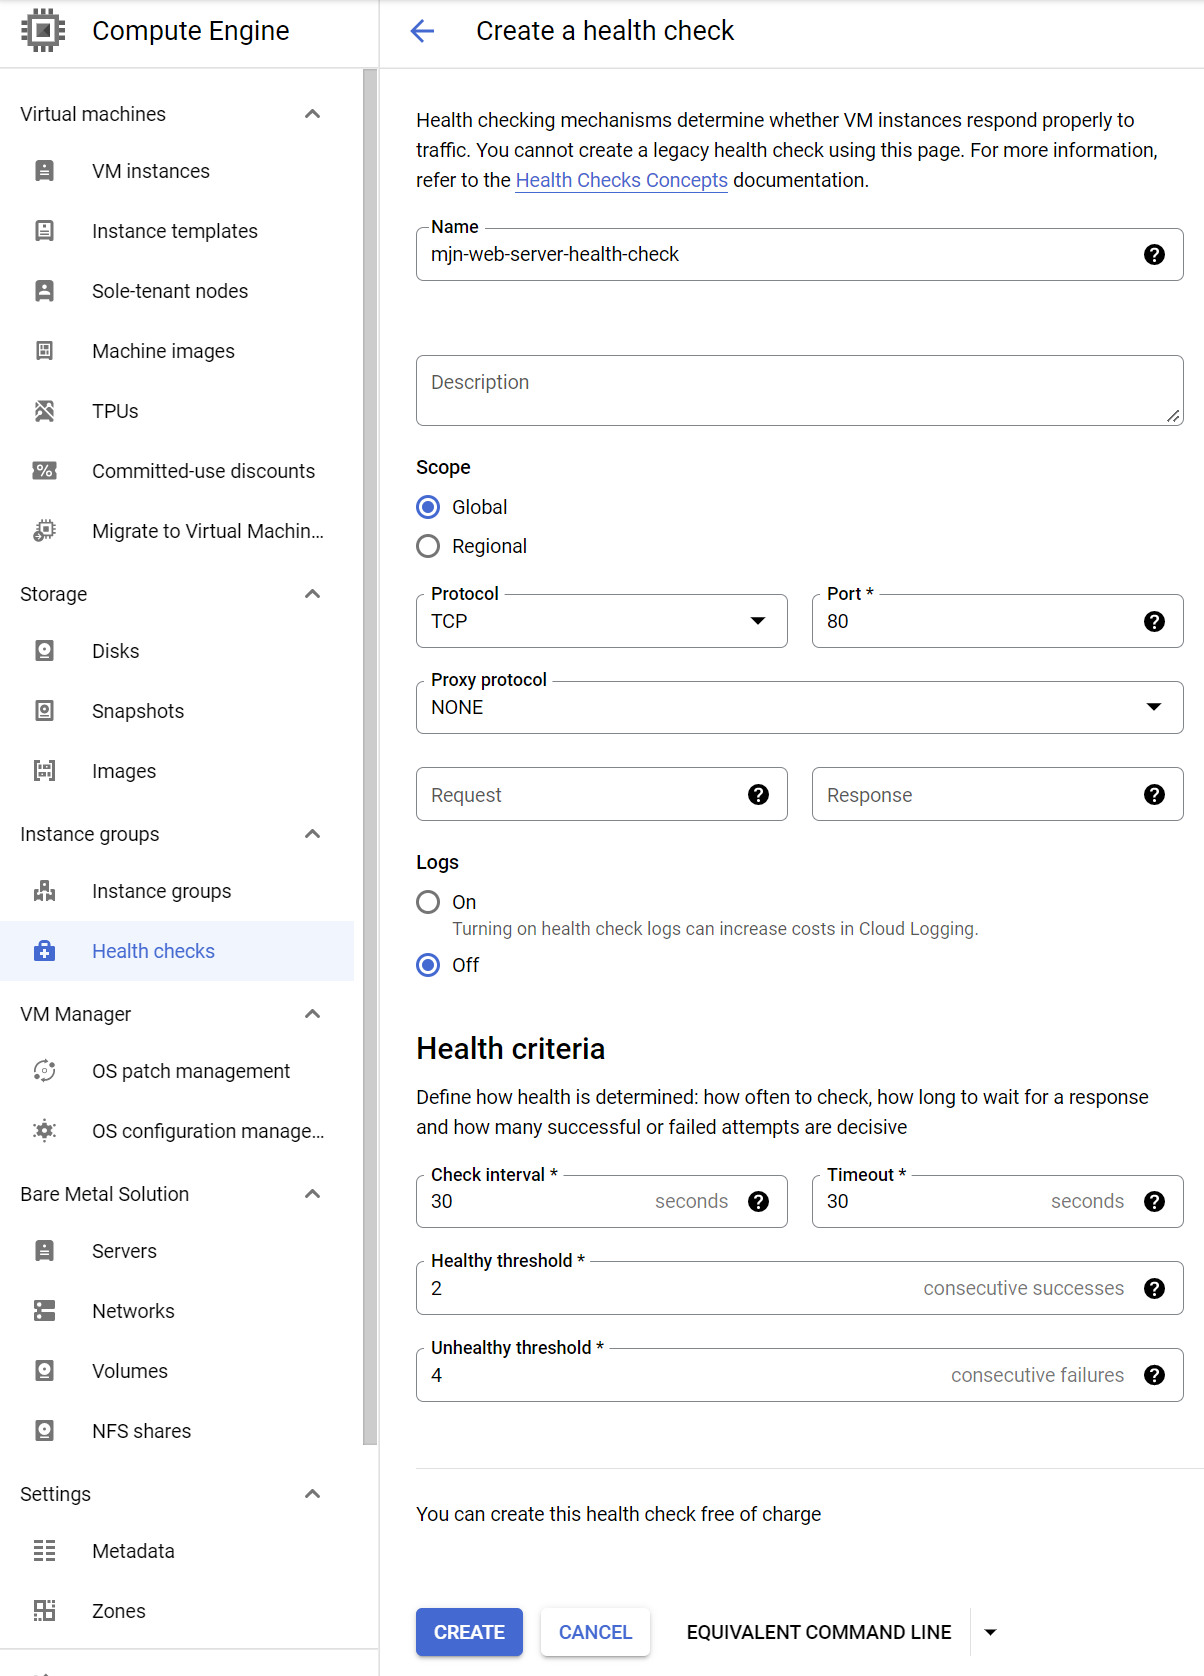
5. Create a Health Check
The load balancer will need a health check to allow it to ignore unhealthy VM’s.
Create a health check - note the criteria are not default.
 |
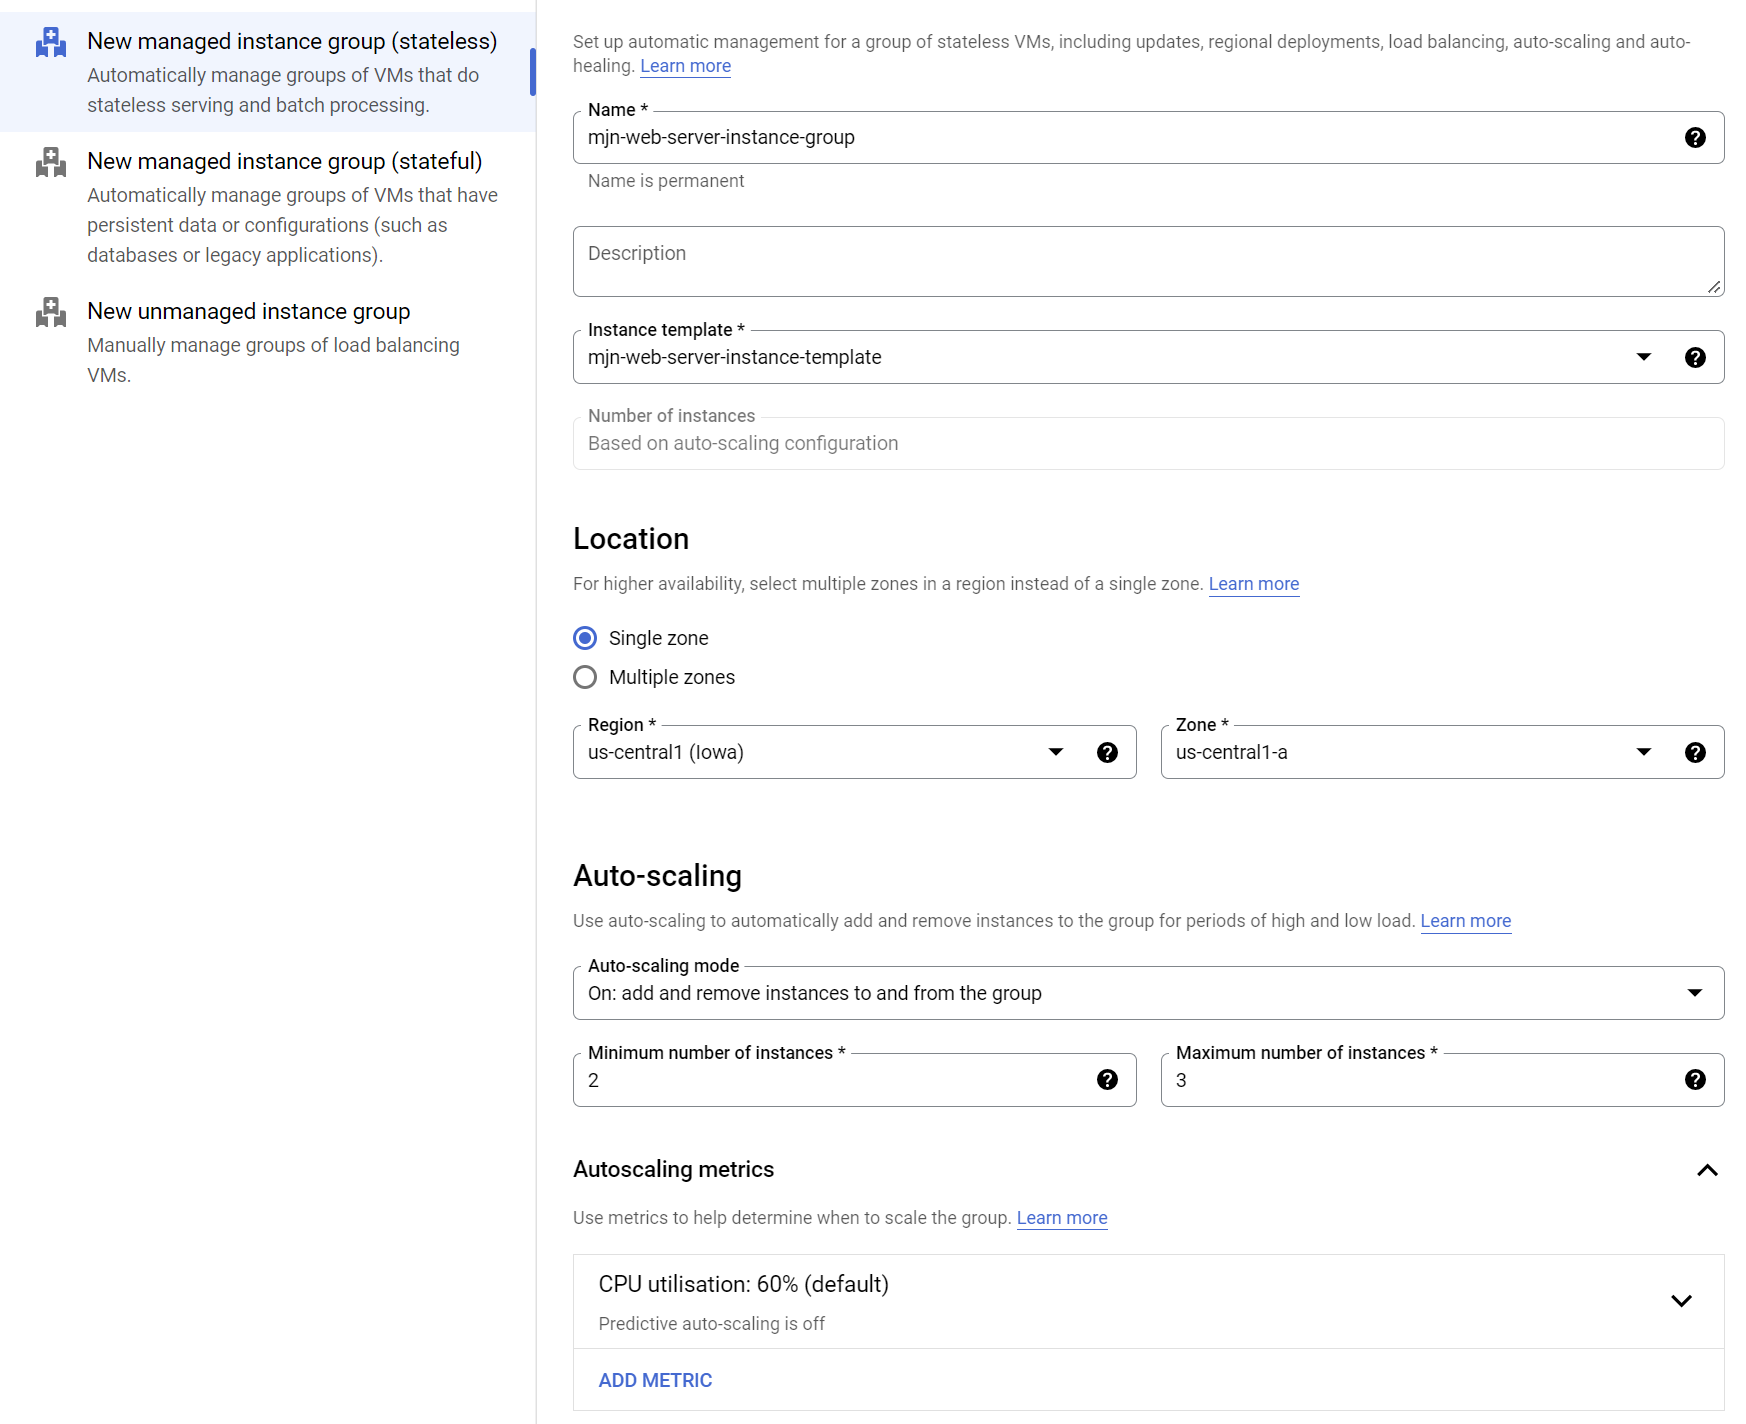
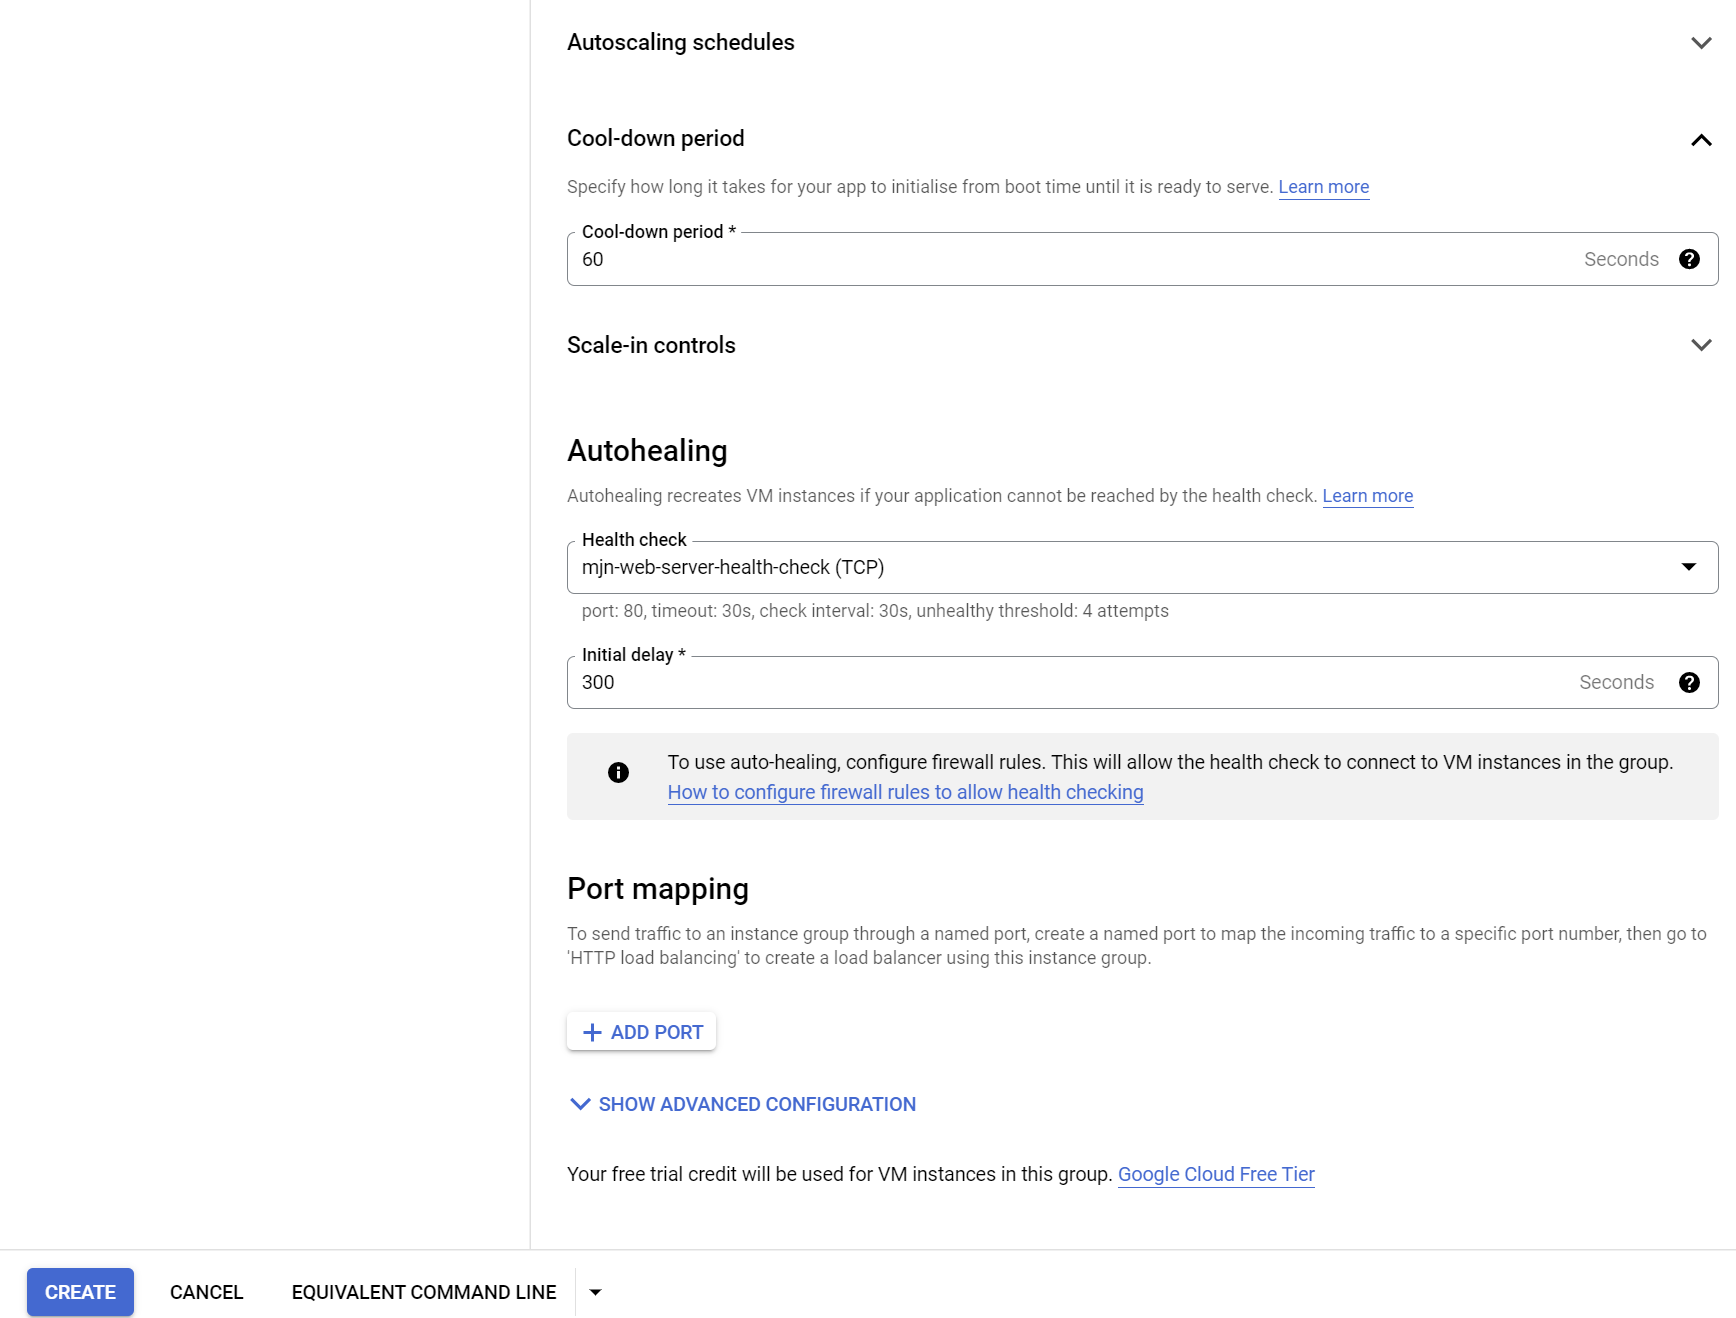
6. Create an instance group using the above instance template.
Note : The minimum number of instances is set to 2 so that we have 2 instances to load balance across in the next step.
 |
 |
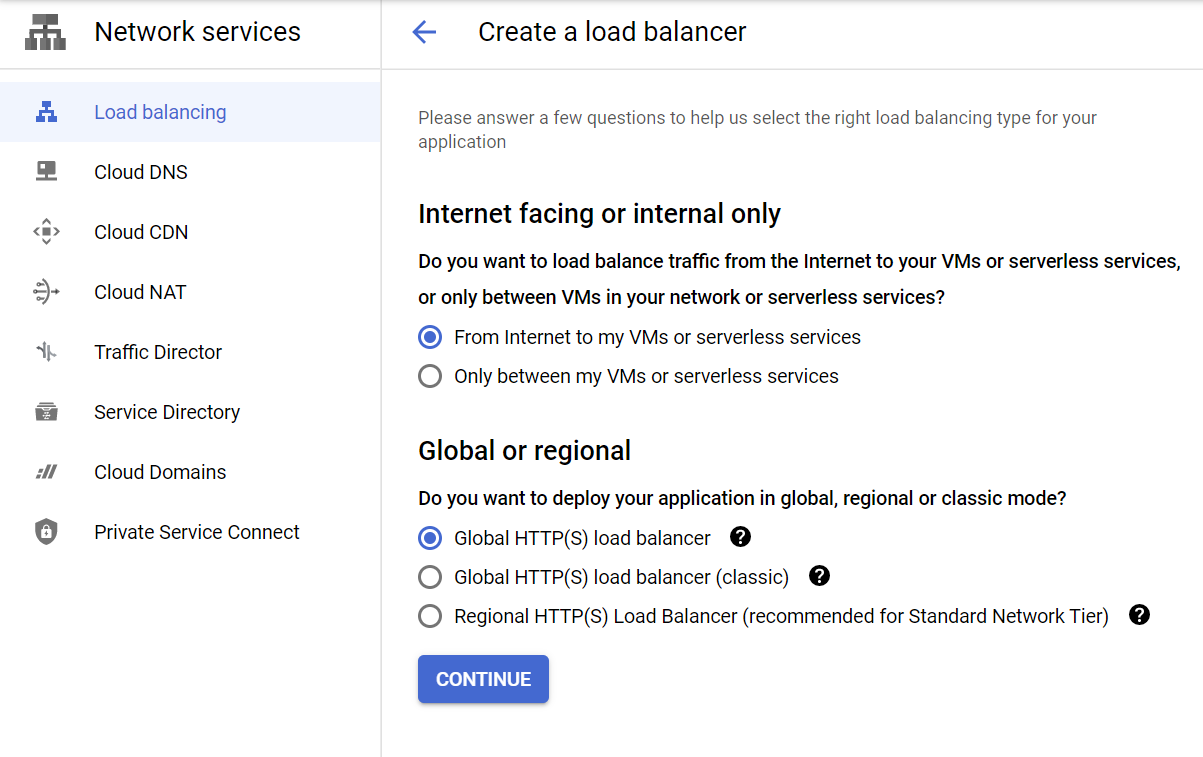
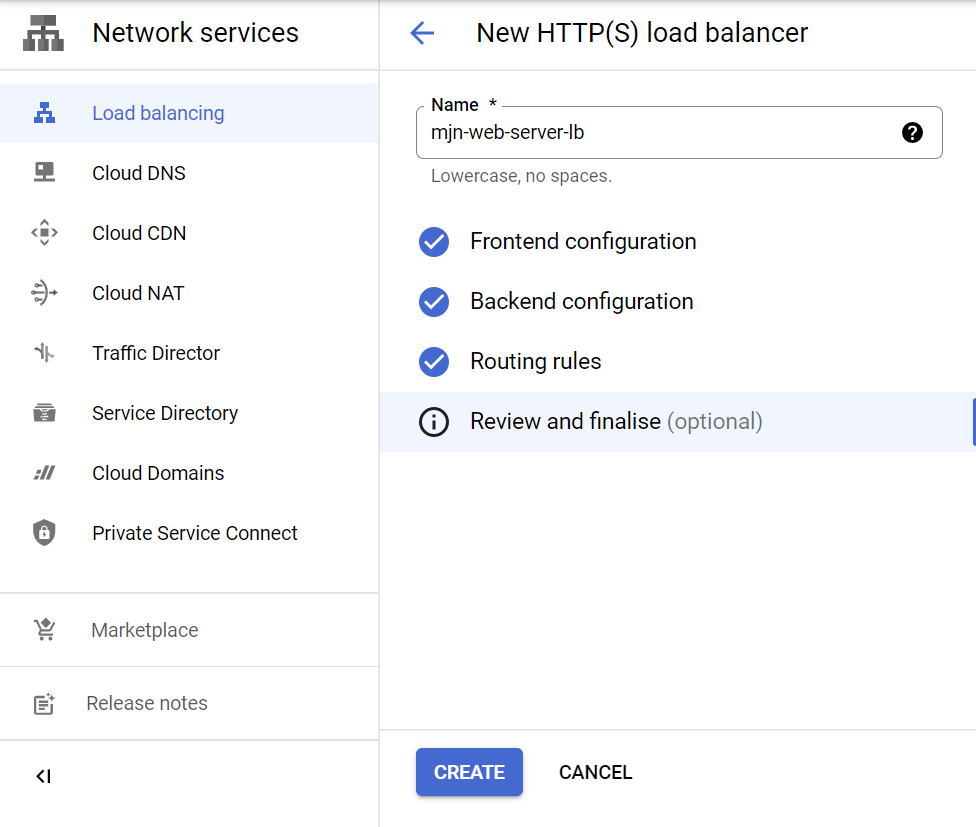
7. Create a load balancer with the instance group as the backend.
Select a HTTP(S) load balancer.
 |
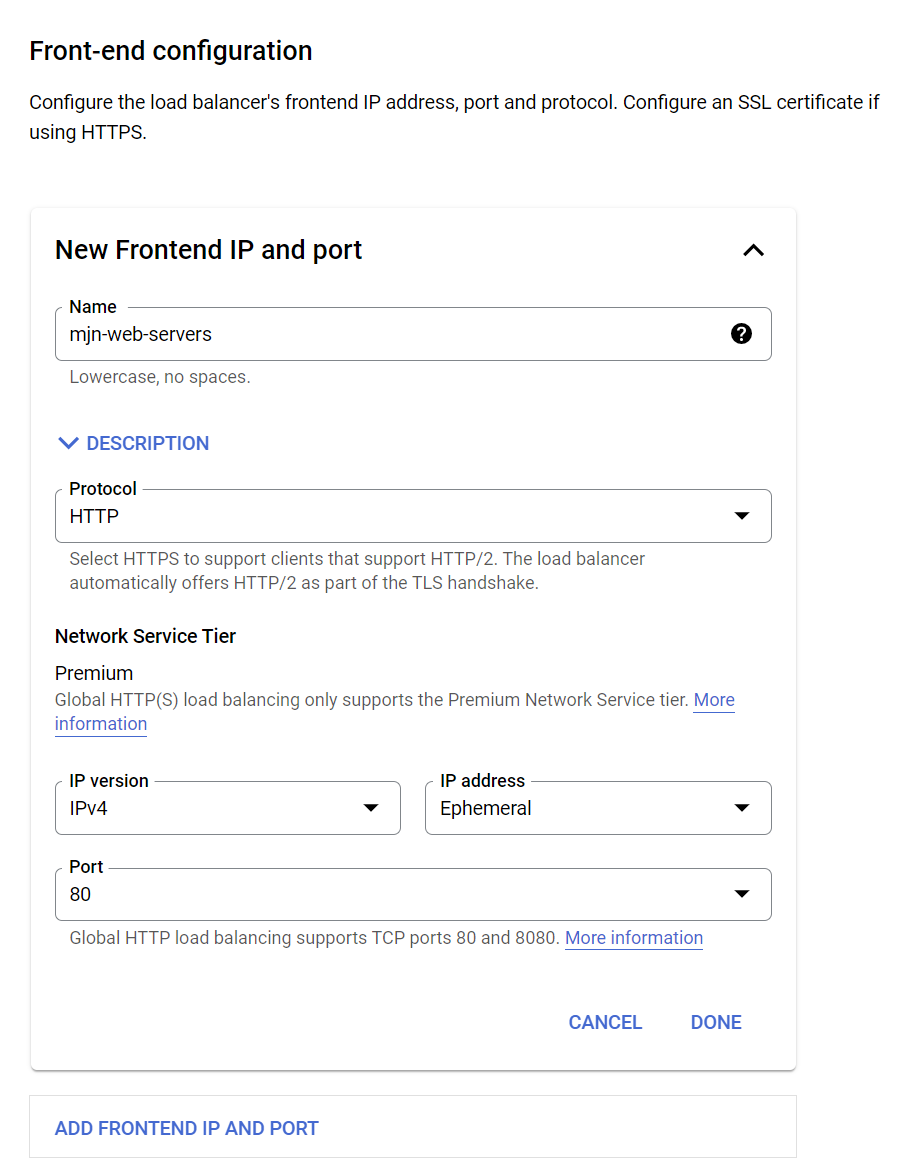
Create a frontend - HTTP, Port 80.
 |
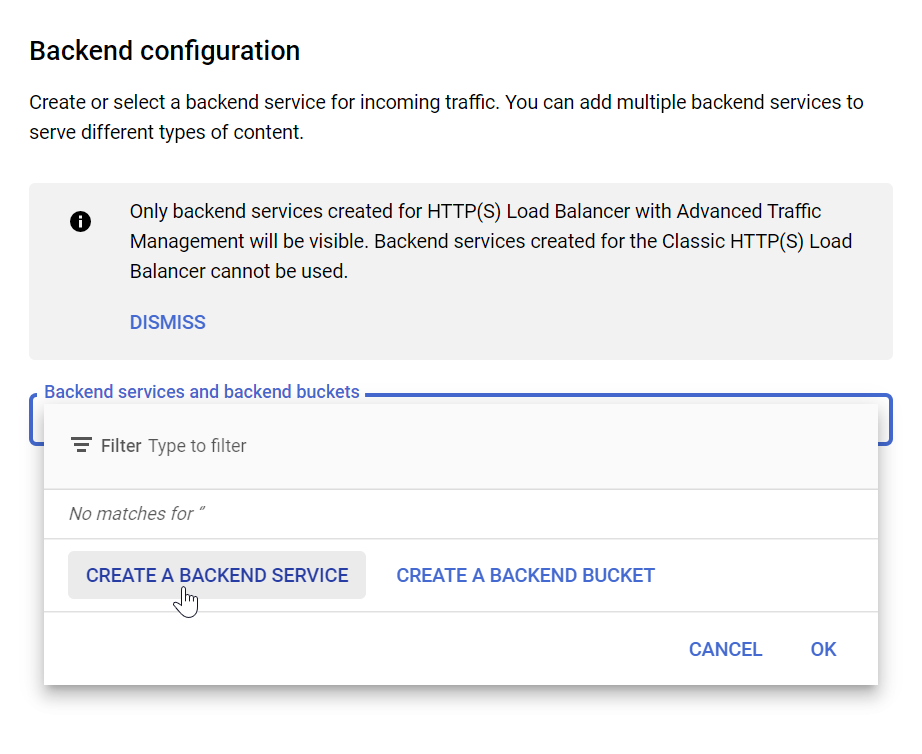
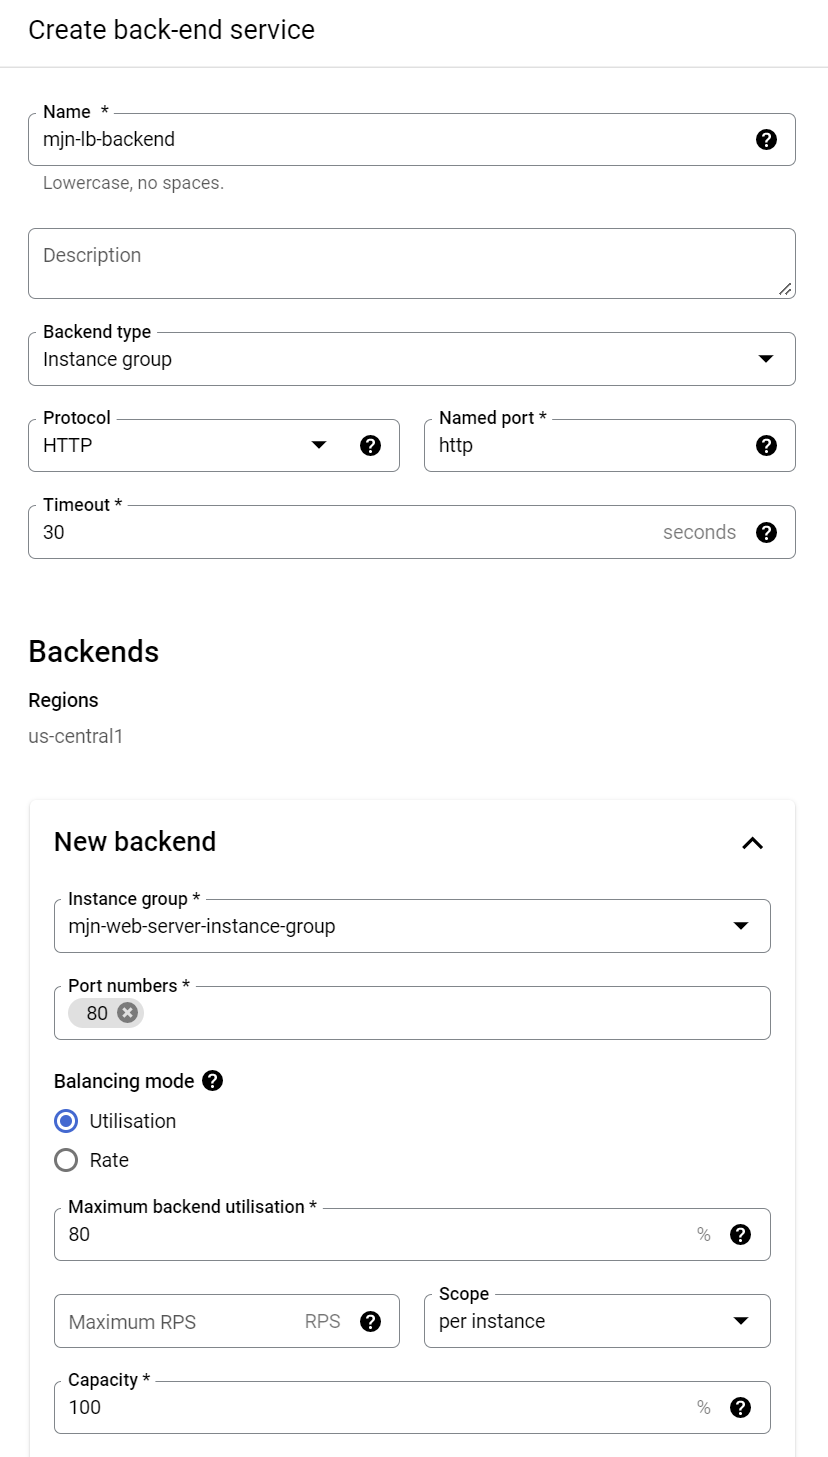
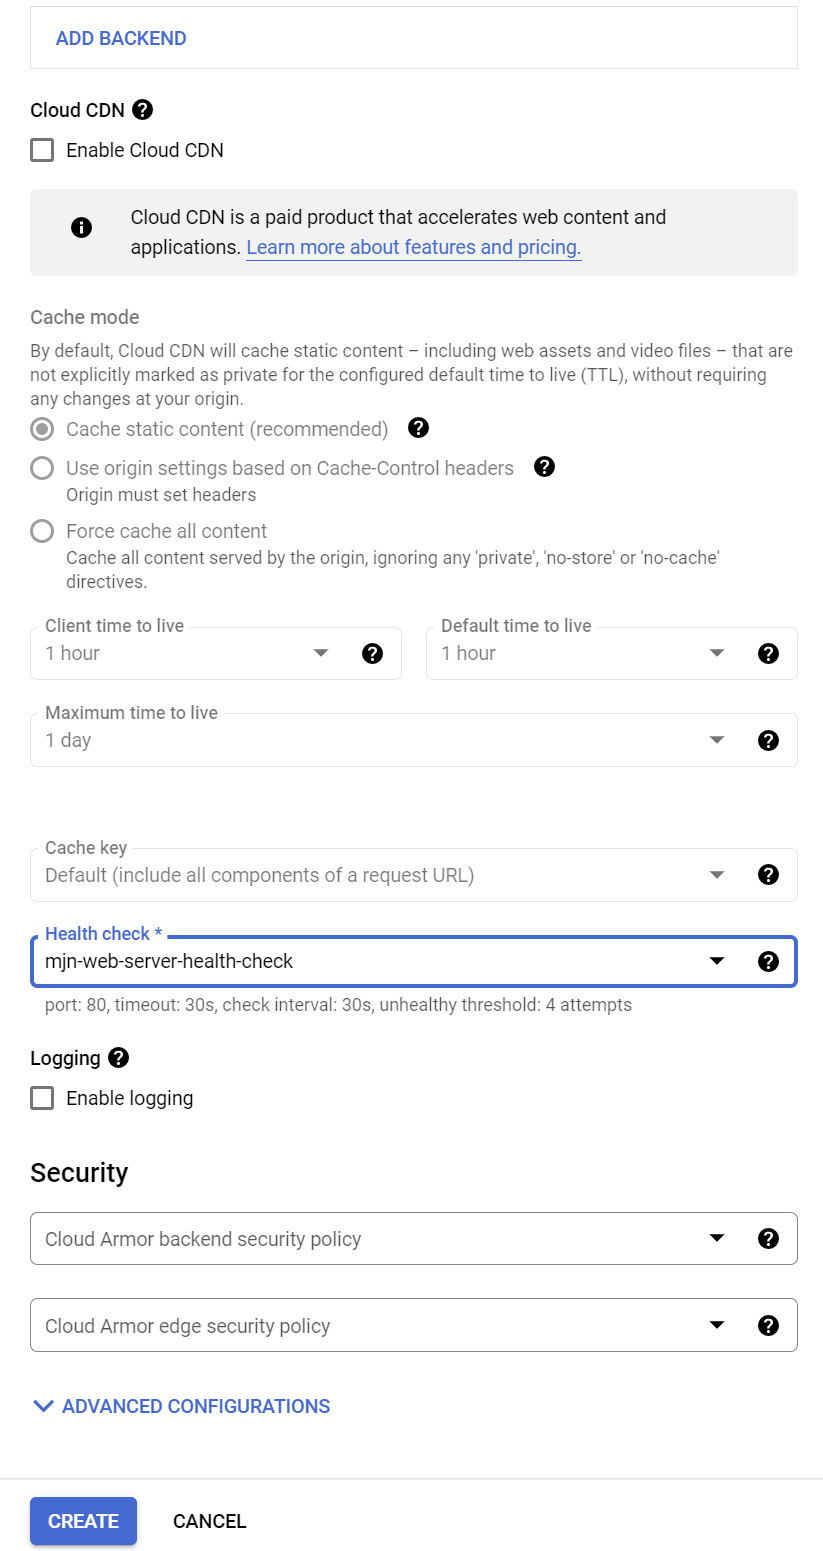
Add a backend. De-select the Cloud CDN - we don’t want any caching in our test.
 |
 |
 |
Set the routing rules - Simple host and path rule.
 |
Ensure the router name is populated and click create.
 |
8. Test the load balancer
The load balancer will have a public IP address. If you go to this address in a web browser and refresh a number of times you will see it switch between the two instances of Apache2 web server and display two different IP addresses on the web page.
This page was generated by GitHub Pages. Page last modified: 22/12/15 16:24