Worked Example - Create Load Balanced Web-Server Managed Instance Group
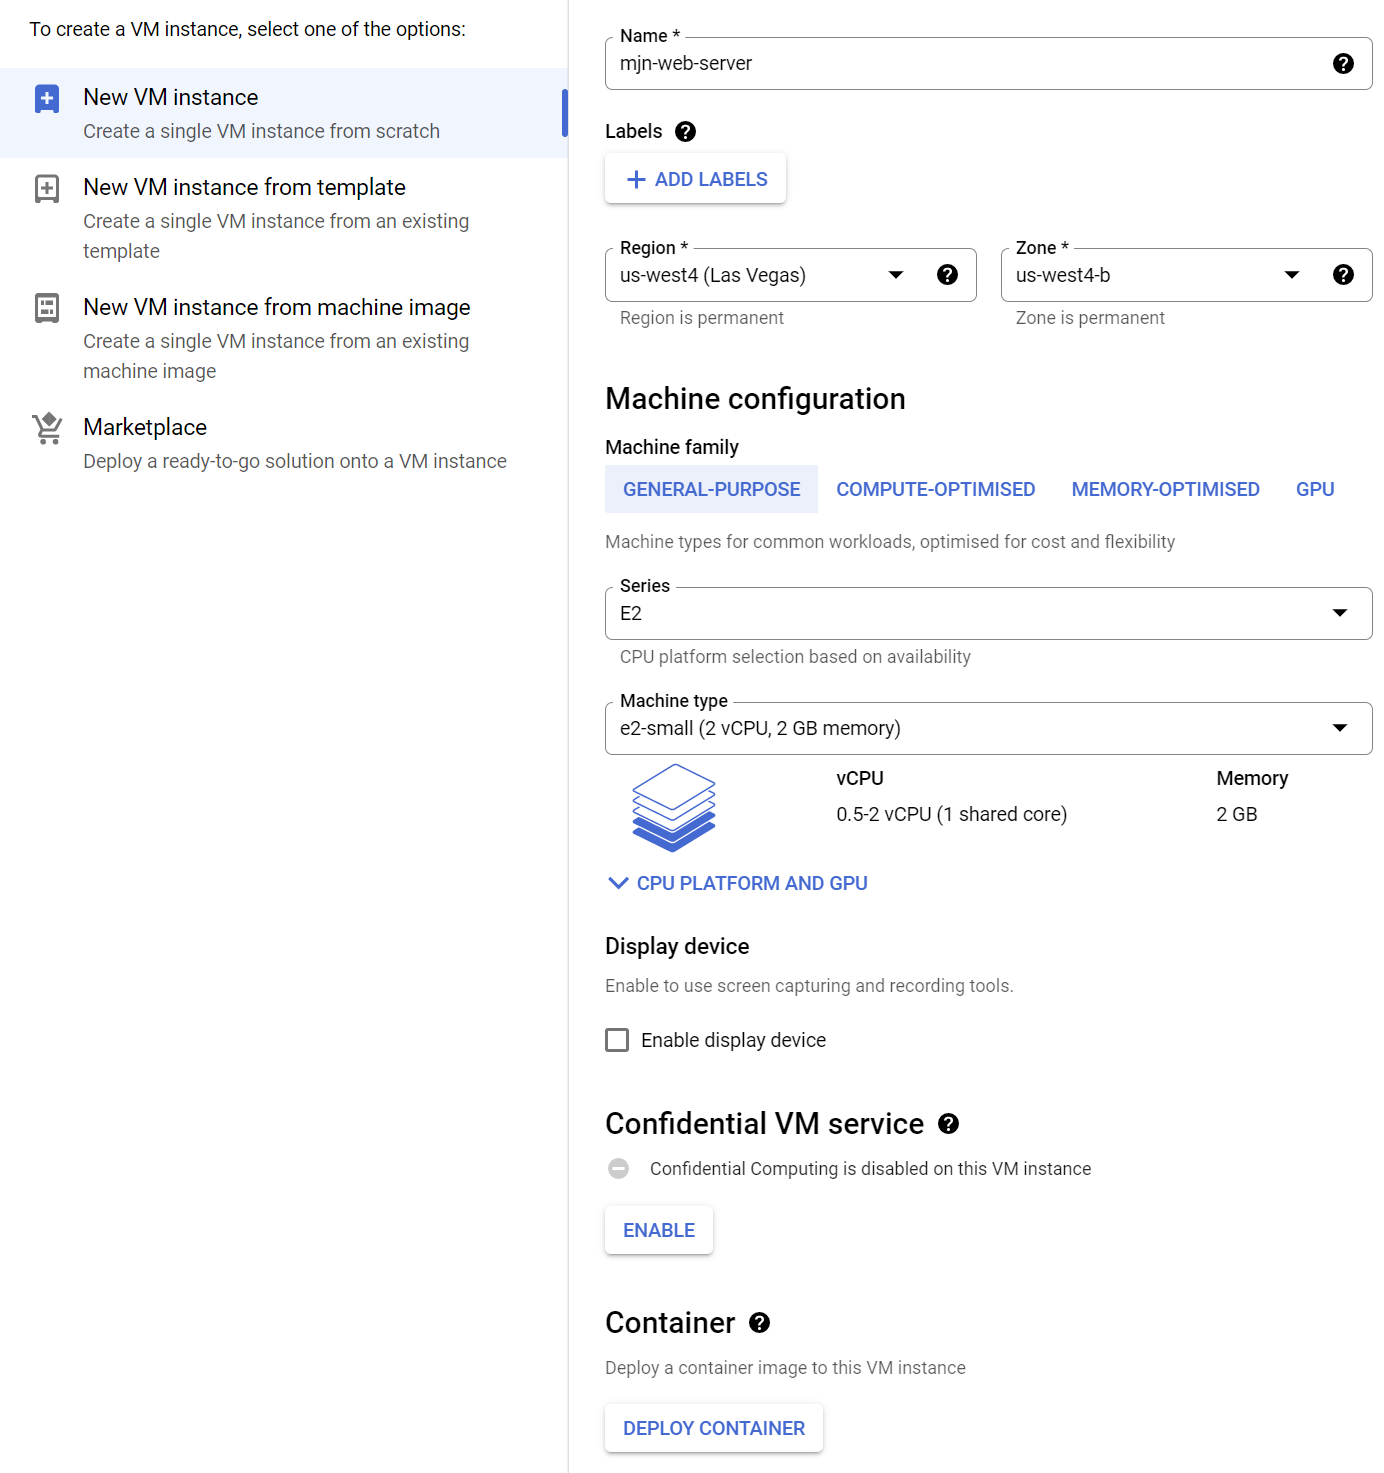
1. Create a VM.
Create a VM
Note: - Select Allow HTTP traffic.
|  |
|
|
|  |
|
2. Install Apache, create a default web page.
SSH to the VM and install config Apache web server. Create a script to run when the instance boots which sets the default web page to show the machine name. Use crontab to run this script when the machine boots.
> sudo su

> apt install apache2

# Create a script to set the default webpage to display the hostname on boot.

> echo 'echo "Hello!" > /var/www/html/index.html' > /onboot.sh
> echo 'hostname >> /var/www/html/index.html' >> /onboot.sh
> echo 'hostname -I >> /var/www/html/index.html' >> /onboot.sh

> chmod +x /onboot.sh

# Update crontab to run the onboot.sh script when the machine boots.

> echo "@reboot /onboot.sh" > mycron

> crontab mycron
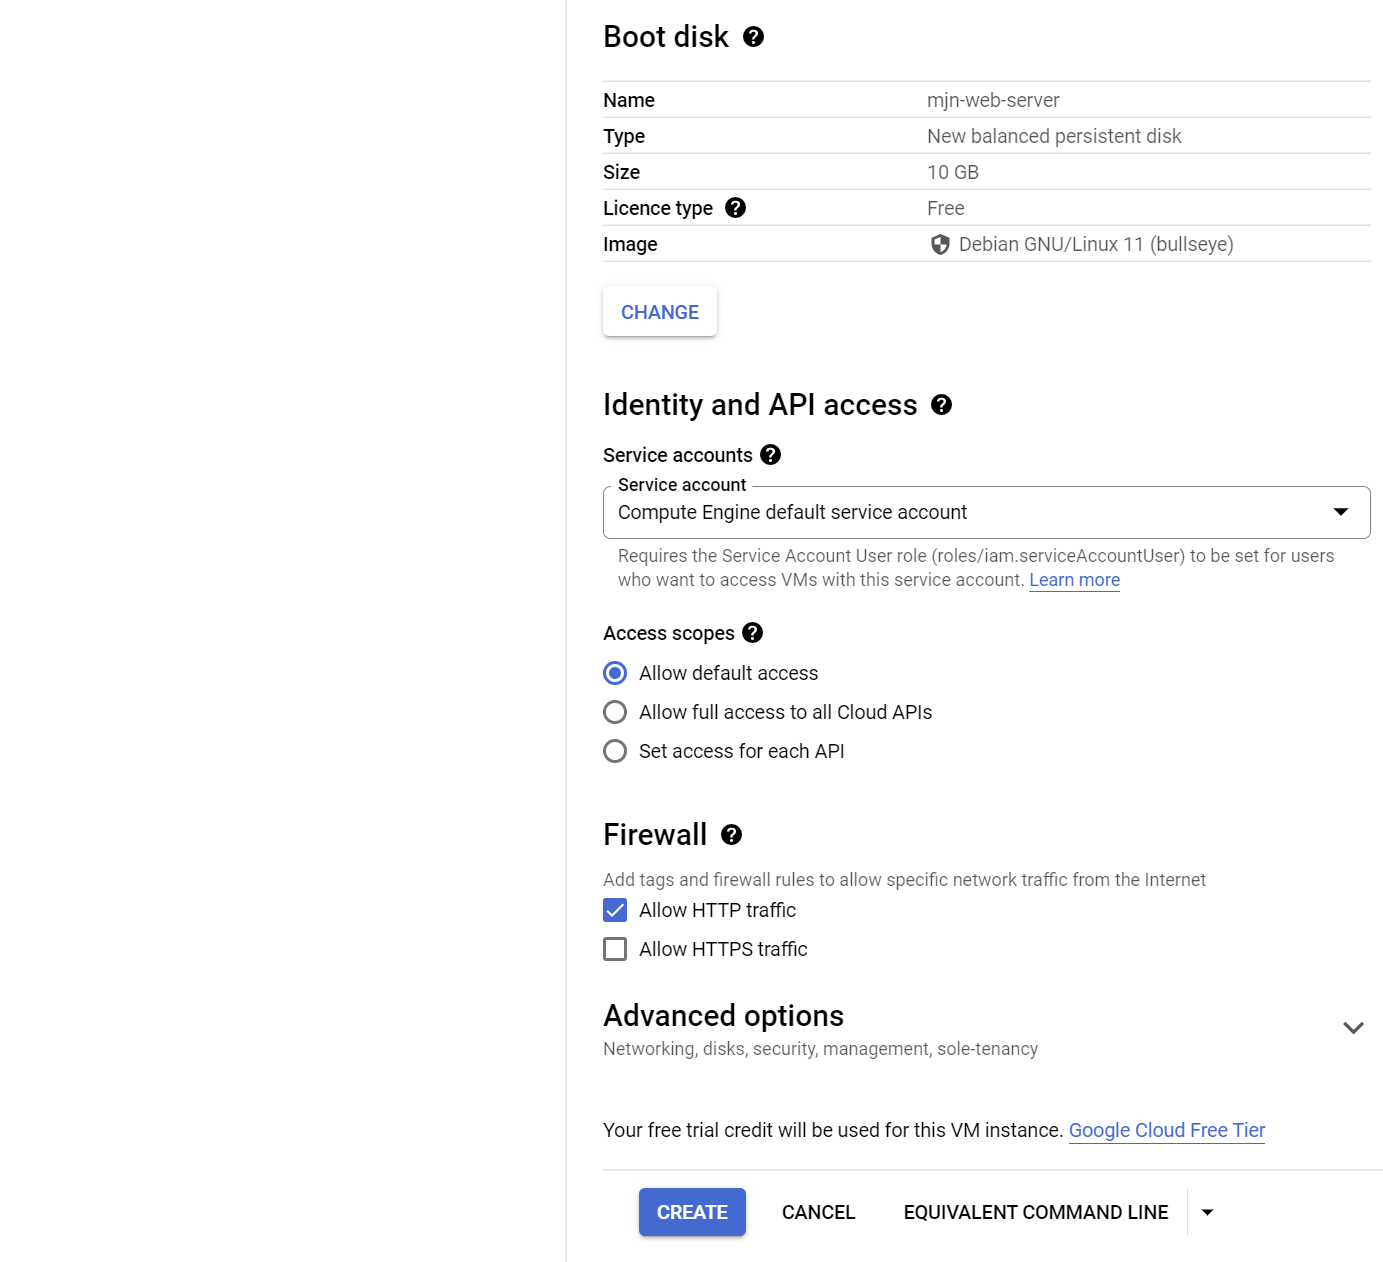
3. Create an image of the boot disk.
Stop the VM, then create an image of the boot disk.
|  |
|
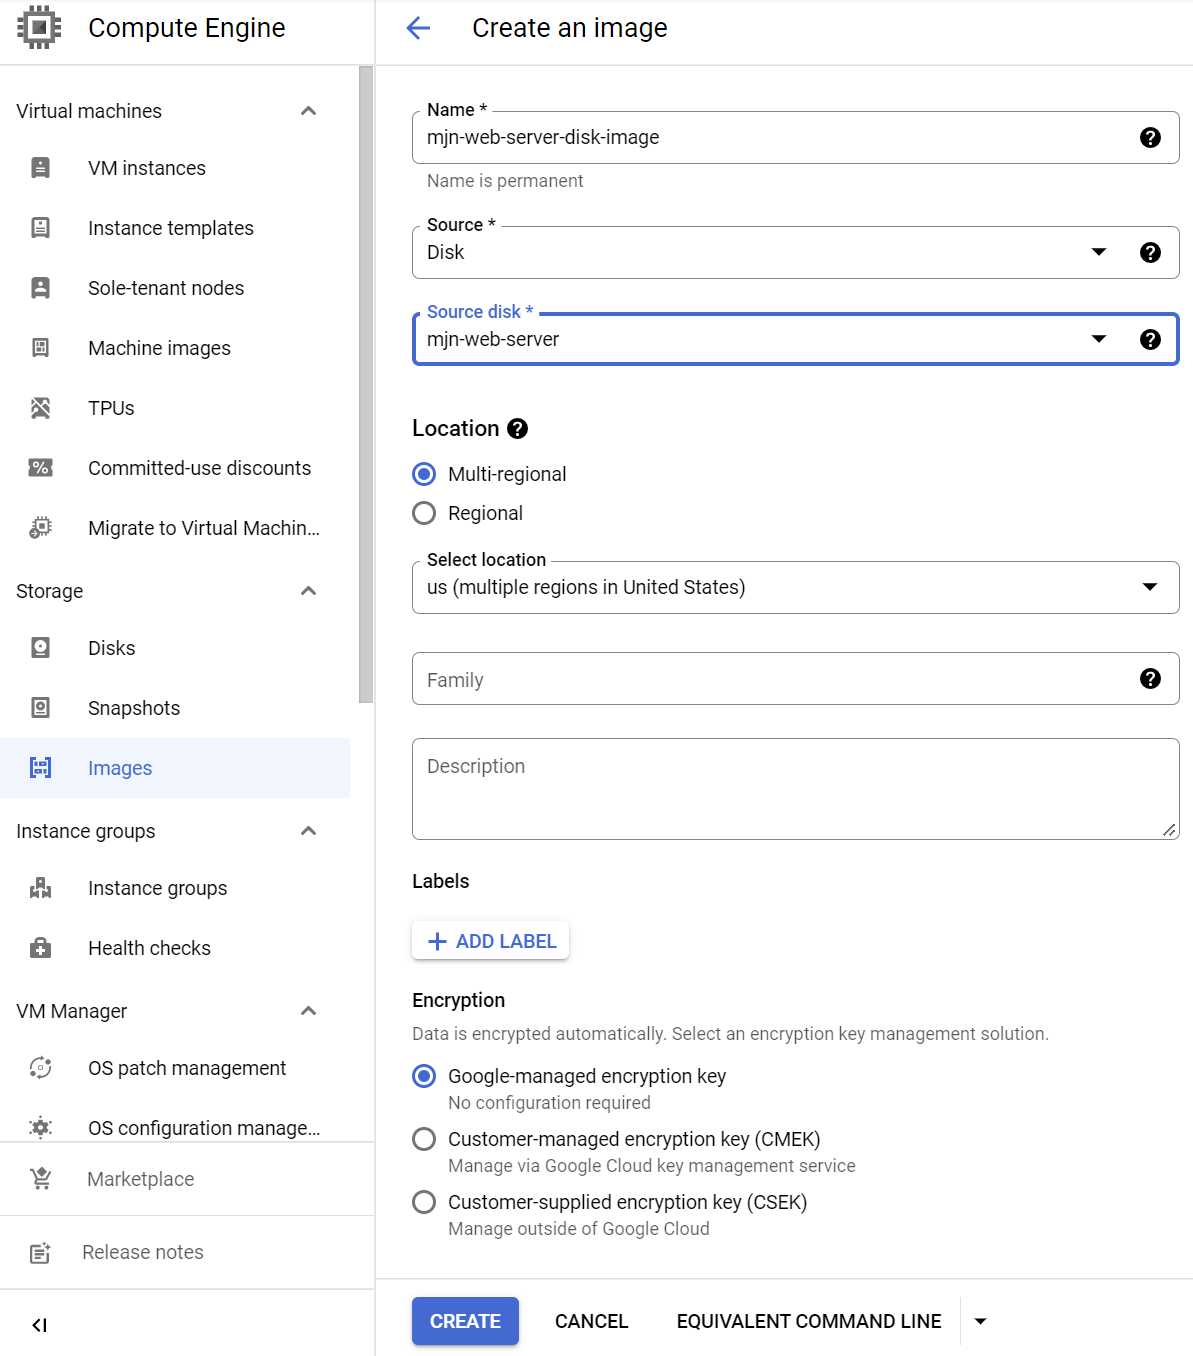
4. Create an instance template and use the boot disk image.
Create an instance template mjn-web-server-instance-template - use the same VM setting as in step 1 but replace the default boot disk - select a Custom Image and choose the disk image created in step 3.
|  |
|
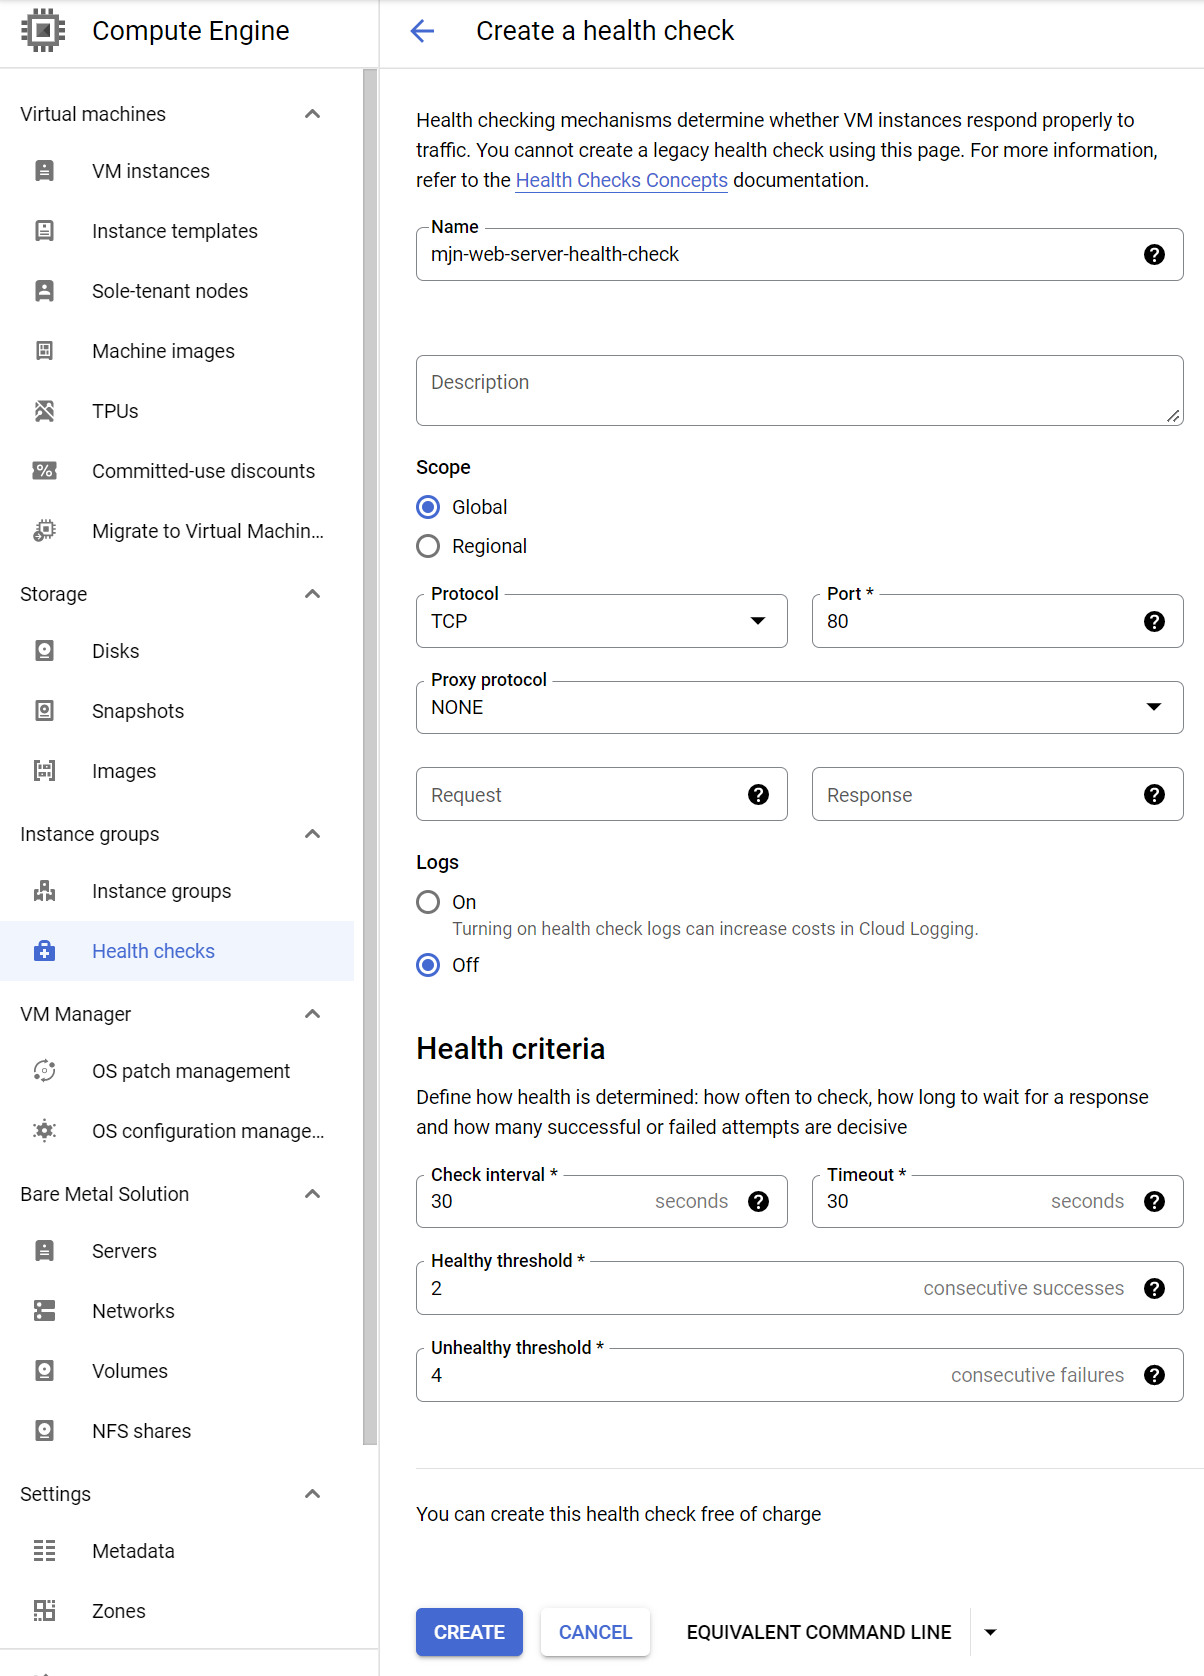
5. Create a Health Check
The load balancer will need a health check to allow it to ignore unhealthy VM's.
Create a health check - note the criteria are not default.
|  |
|
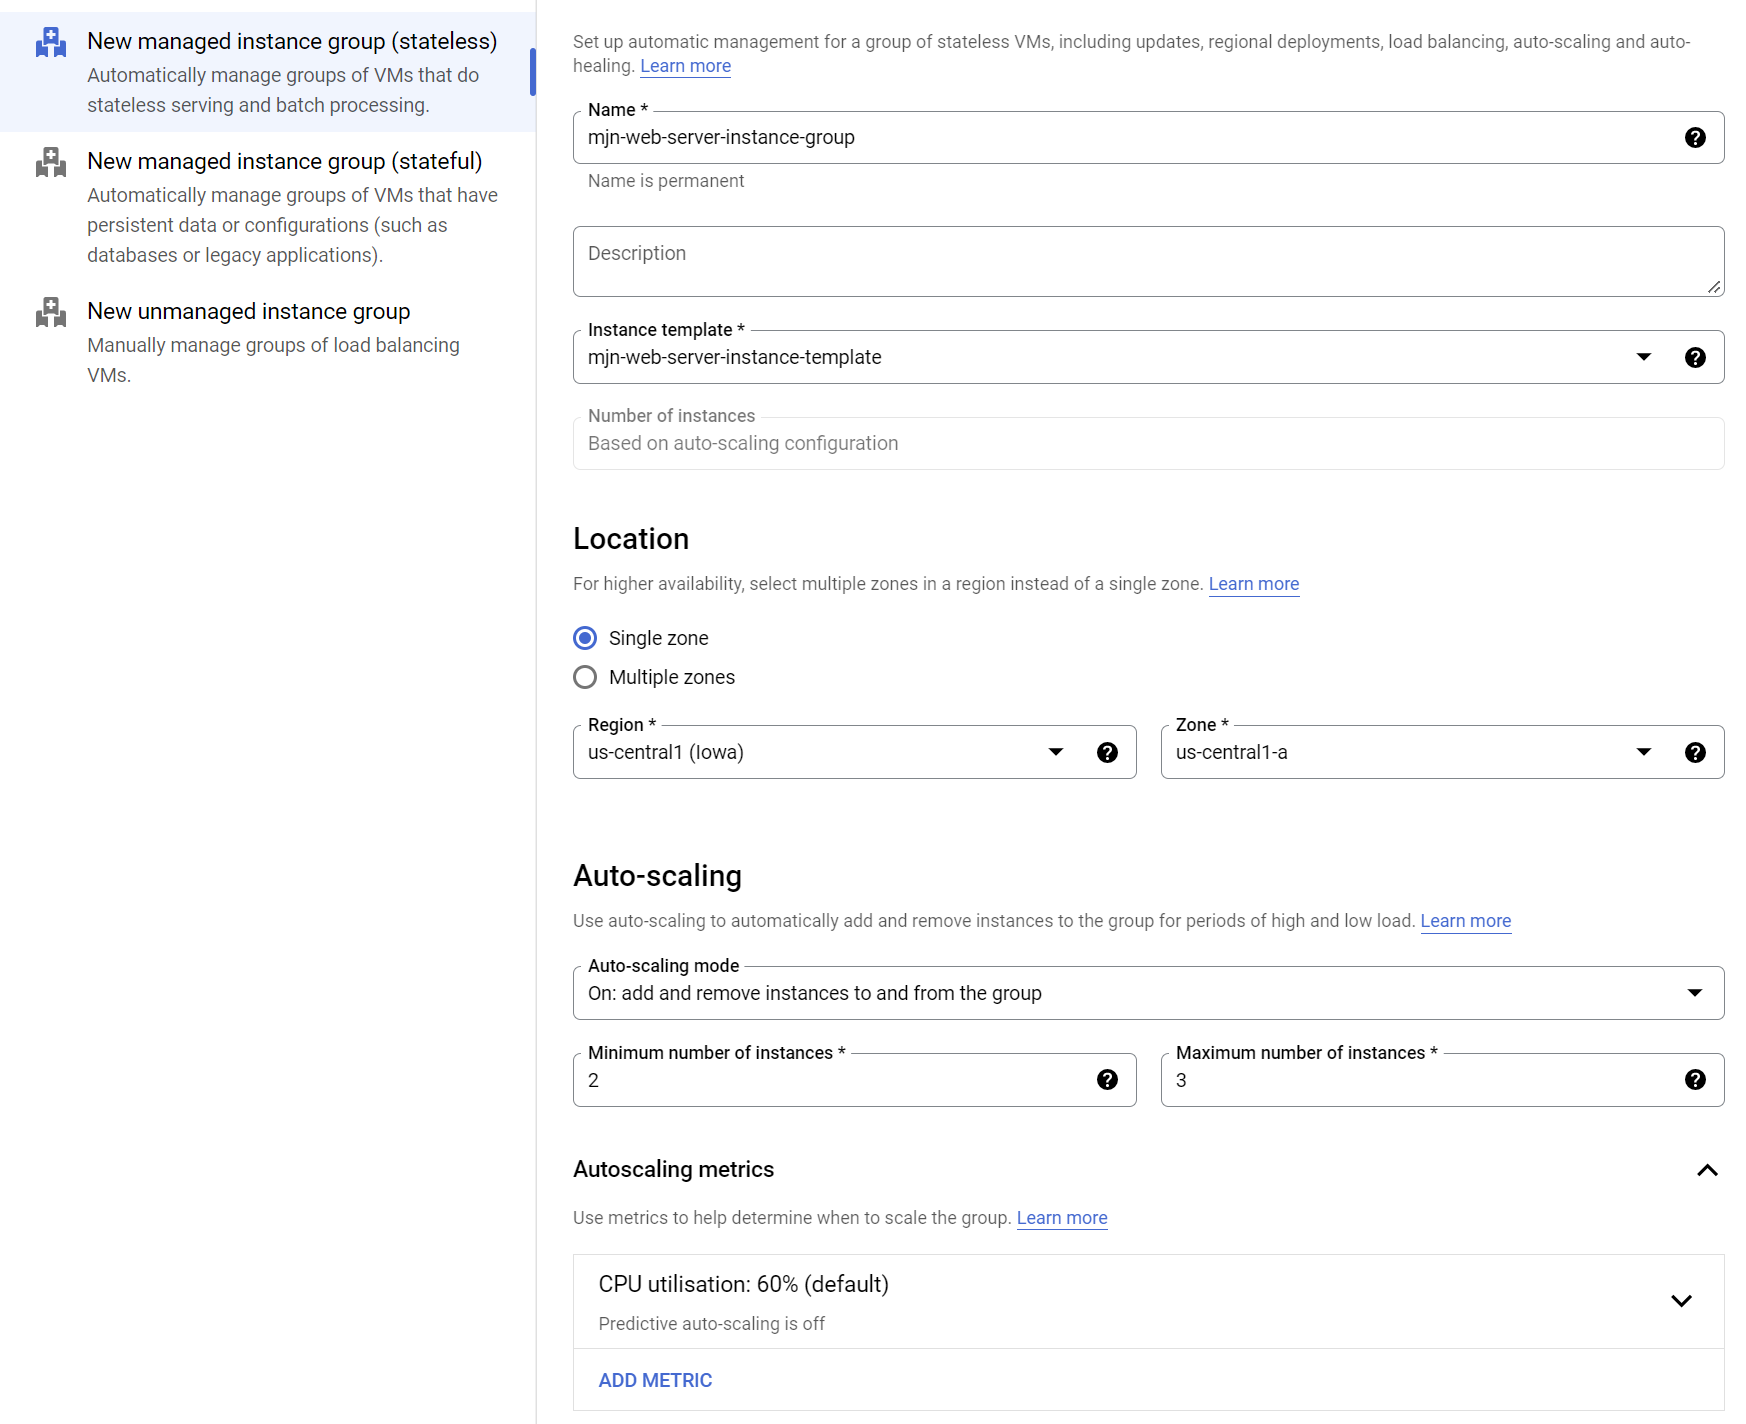
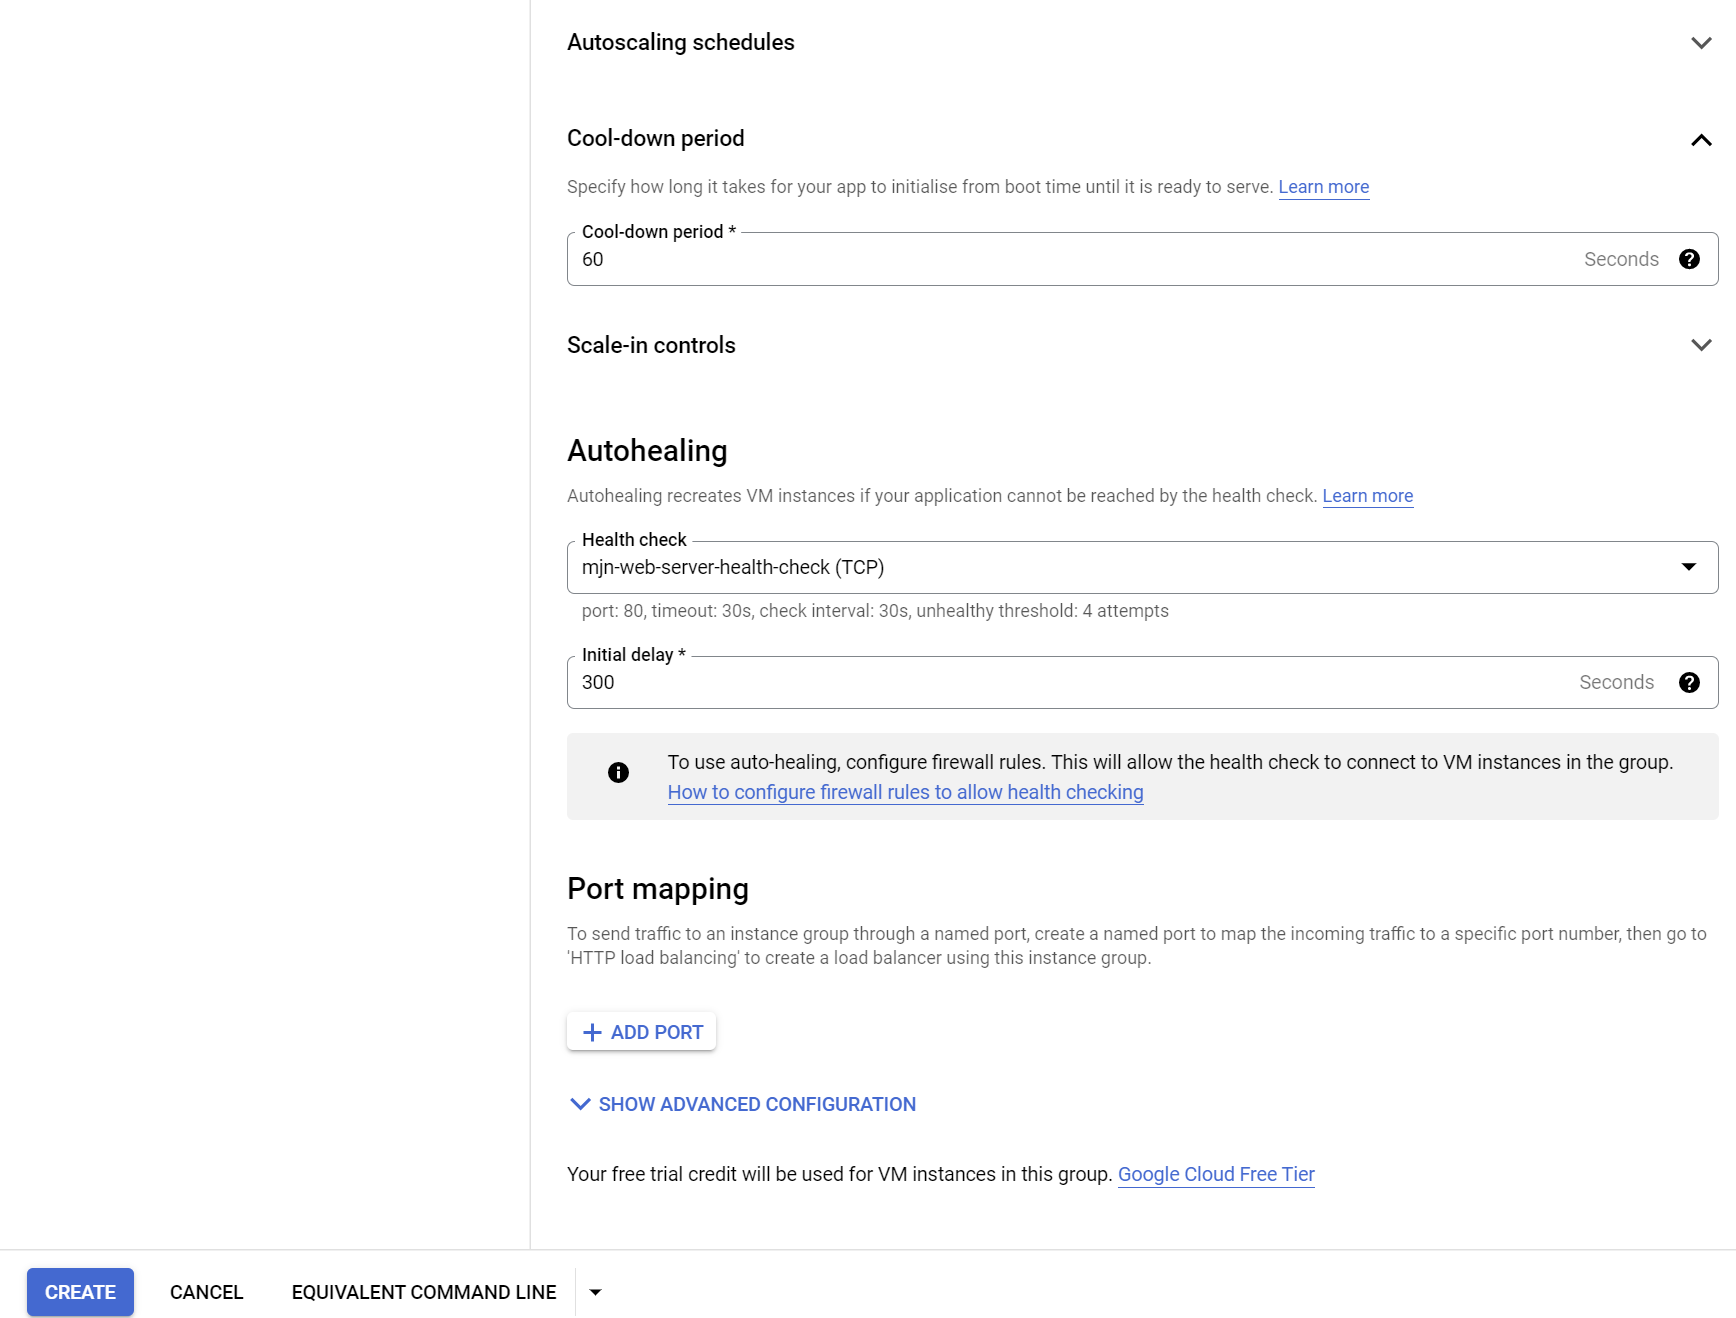
6. Create an instance group using the above instance template.
Note : The minimum number of instances is set to 2 so that we have 2 instances to load balance across in the next step.
|  |
|
|
|  |
|
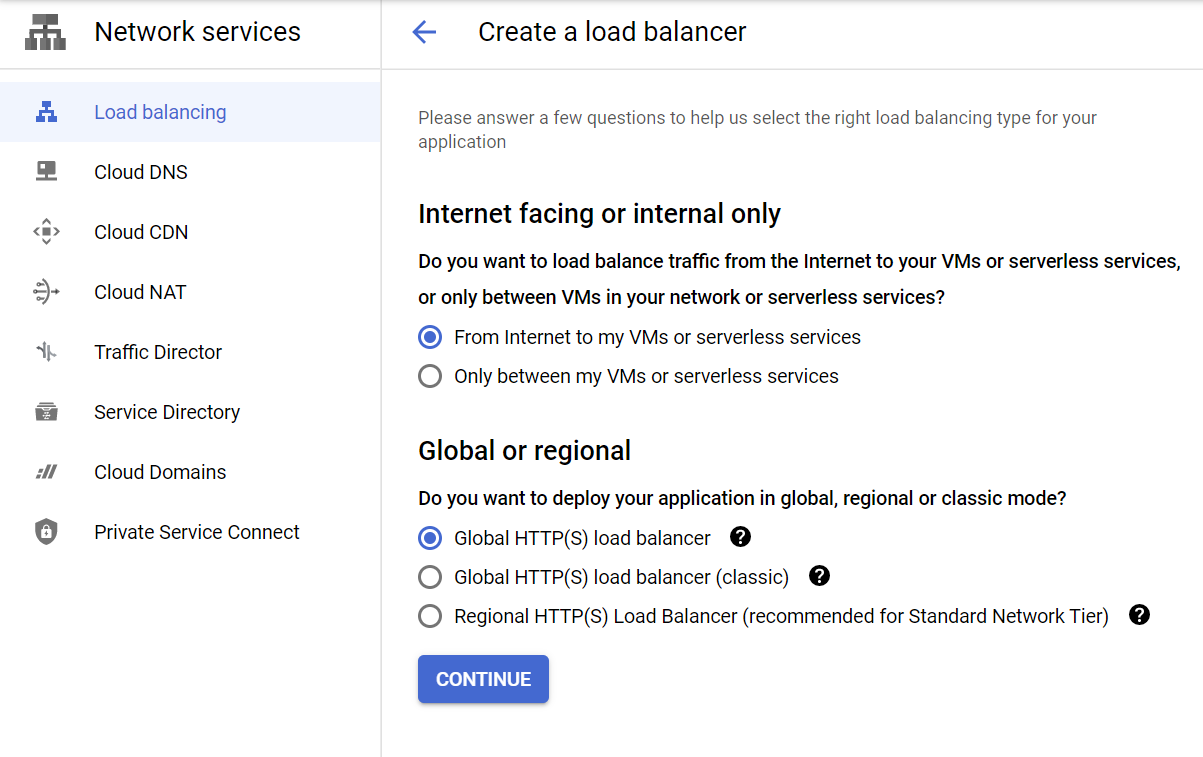
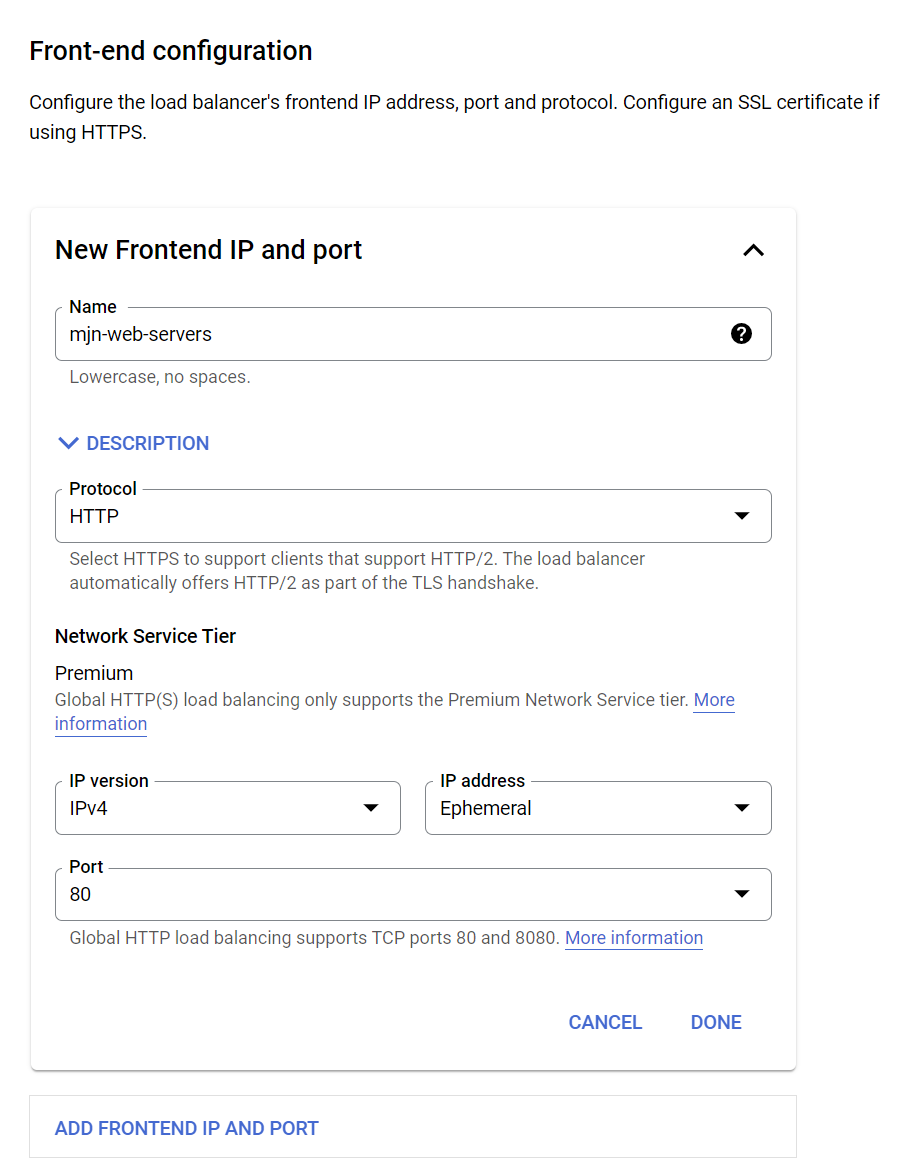
7. Create a load balancer with the instance group as the backend.
Select a HTTP(S) load balancer.
|  |
|
Create a frontend - HTTP, Port 80.
|  |
|
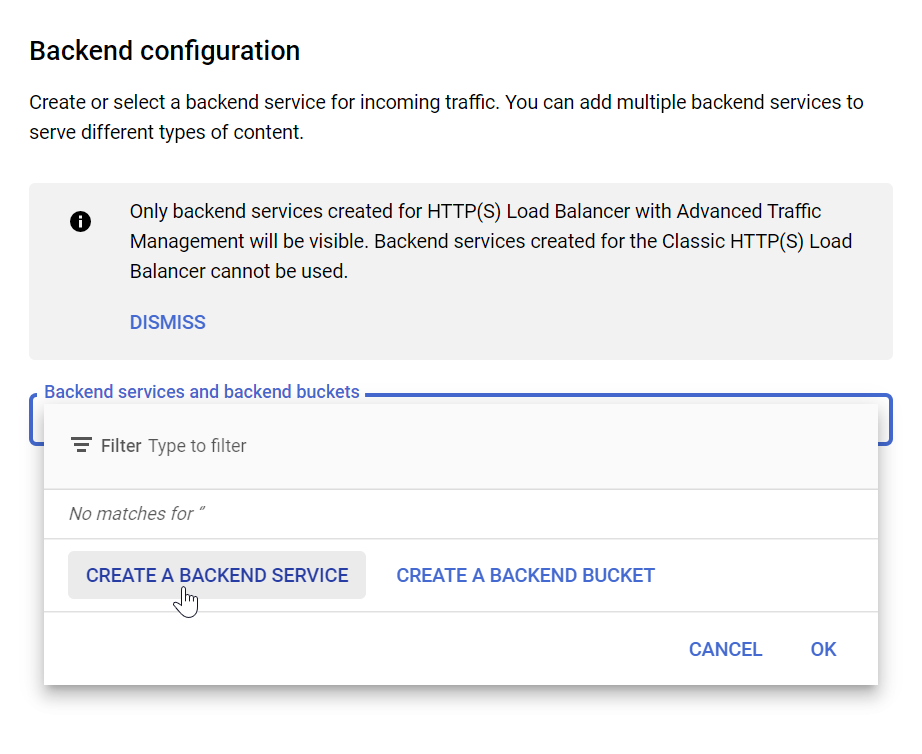
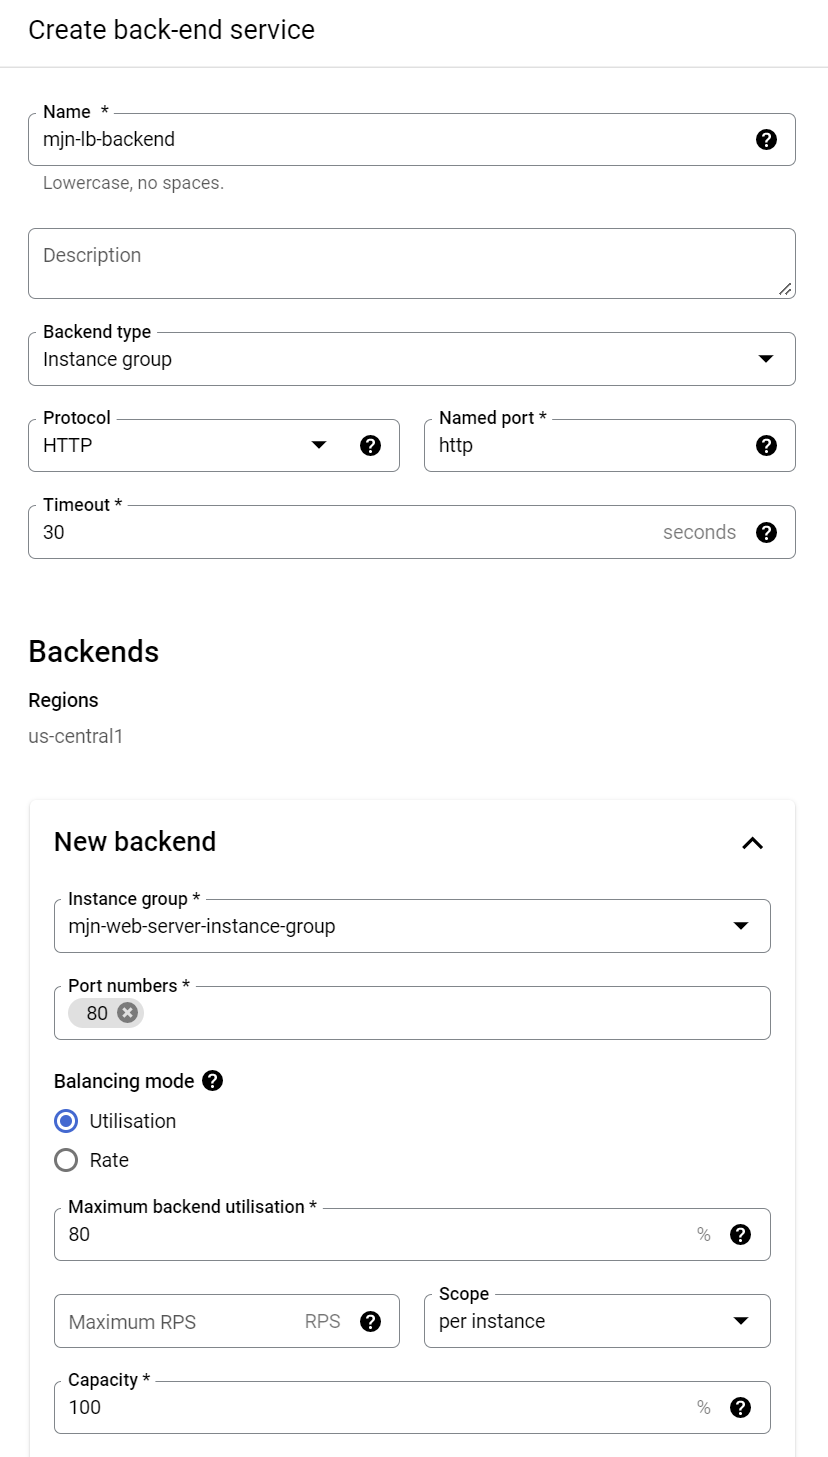
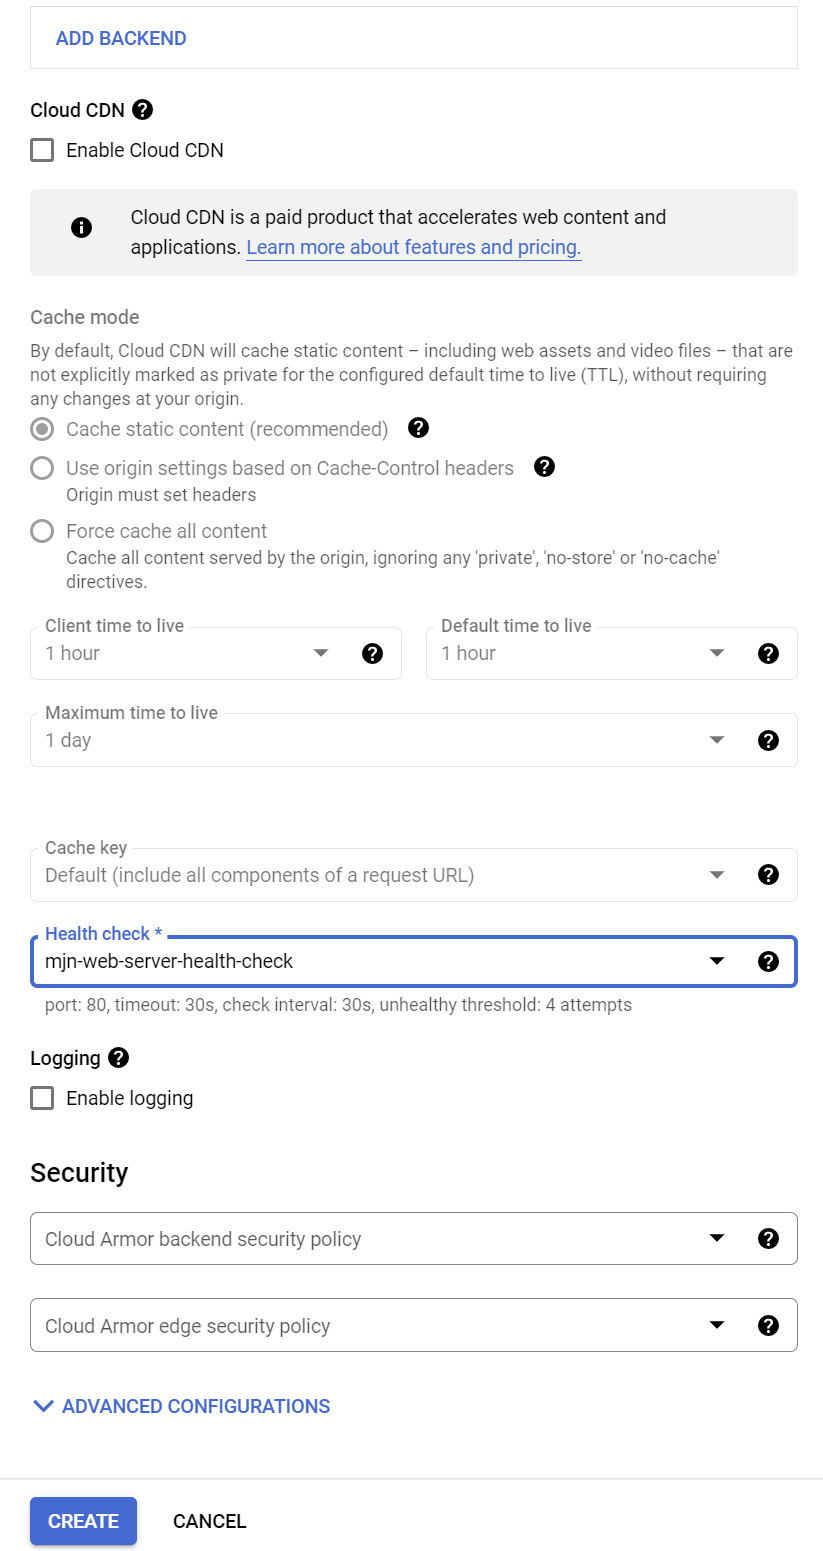
Add a backend. De-select the Cloud CDN - we don't want any caching in our test.
|  |
|
|
|  |
|
|
|  |
|
Set the routing rules - Simple host and path rule.
|  |
|
Ensure the router name is populated and click create.
| 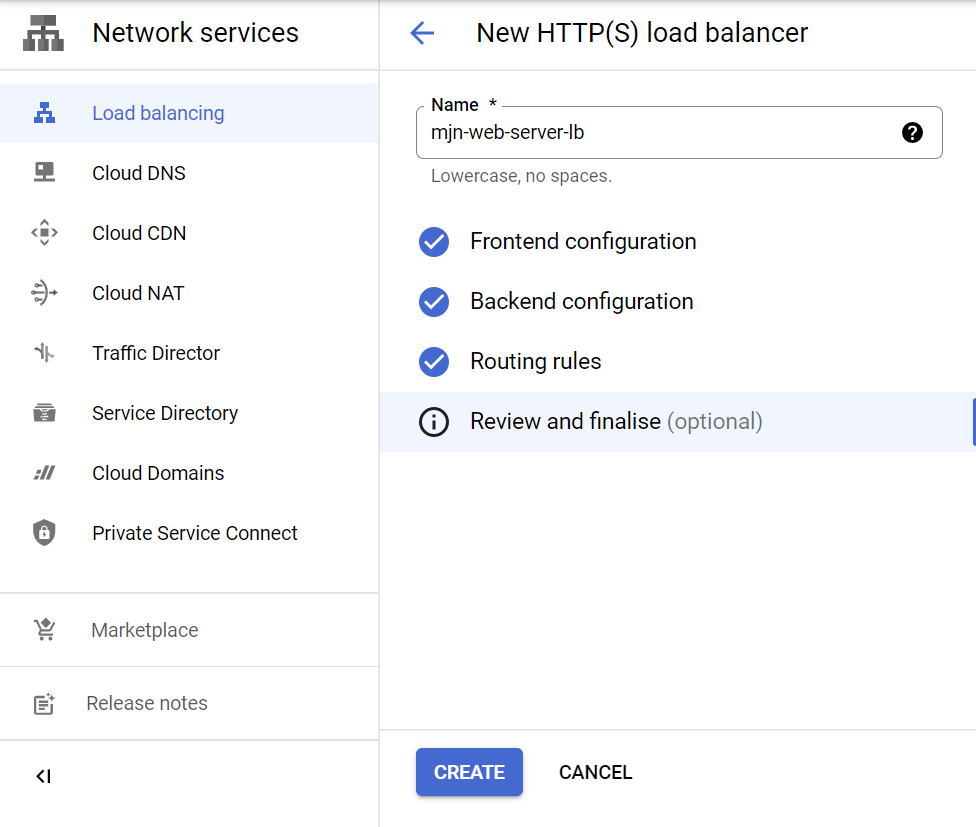 |
|
8. Test the load balancer
The load balancer will have a public IP address. If you go to this address in a web browser and refresh a number of times you will see it switch between the two instances of Apache2 web server and display two different IP addresses on the web page.